Home Page Widgets
Welcome to our documentation on customizing the images on store's home page using the Rotating Images, Pod Images, and Category Images.

Rotating Images:
They're like a images slideshow of what makes store look awesome. You can add multiple images to the slider one by one. Experience different views with our rotating image section on the store homepage.
Add a Rotating Image:

- Click Add New Item.
- Choose an image.
- Select where you want to show the image - like on a product page, against a category, an information page or other reference link.
- Click Save.
Options:

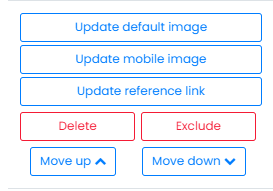
- Update default image: Change the picture for your rotating images.
- Update mobile image: Customize the rotating image specifically for mobile view.
- Update reference : Modify the link destination.
- Delete the image: Remove selected rotating image.
- Exclude: Exclude the image from specific store groups.
Rearrange the images by moving them up or down to determine their display order.
Pod Images:
Pod images serve as the category representation images displayed on store homepage, showcasing product categories related to specific niches.

Add a Pod Image:

- Click Add New Item .
- Select a image representing the category or niche.
- Optional, Include a button to provide a link to featured category pages.
- Click Save.
Options:
- Update the default image: Change the image.
- Update reference: Modify the link destination.
- Delete the image: Remove the pod image.
- Exclude: Exclude the image from specific store groups.
Rearrange the sequence by moving up or down for display order.
Category Images (Header and Footer):
Category images allow you to add headers and footers to product category pages.
- Choose the category.
- Decide where to place the image – header or footer.
- Upload image, add text, or use an HTML widget for more.
- Click 'Save' to apply changes.
Edit or Delete:
To edit, select the category and position. Update or clear content. To exclude this for specific store groups, click Exclude. A list of store groups will appear, from which you can delete a group by clicking the button next to it.
Home Widget Documentation for Store Groups
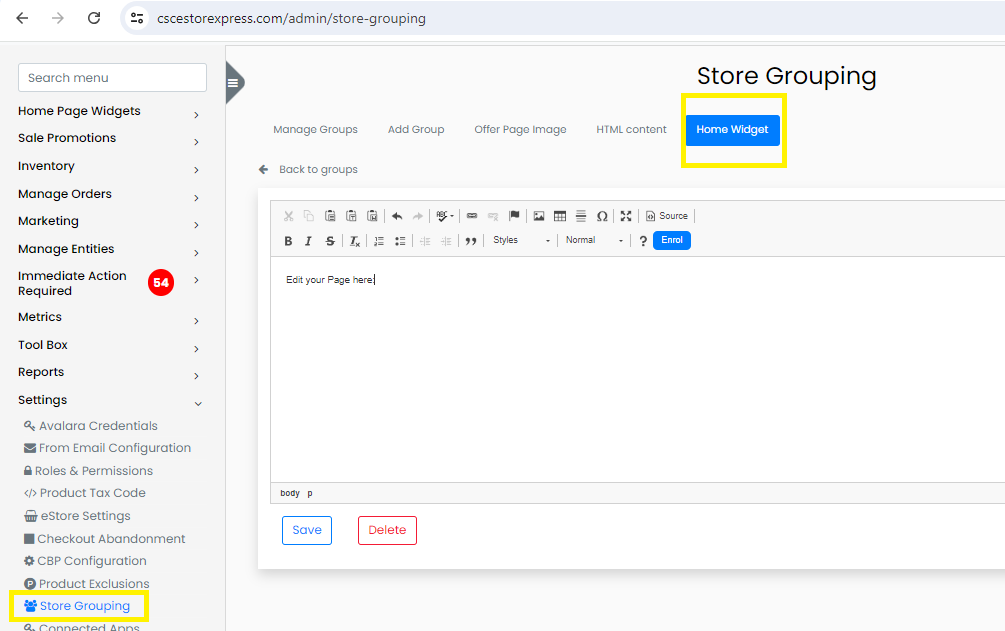
Welcome to the documentation for the Home Widget in Store Groups! This feature allows users to customize their store pages with images, text, and various types of content. Changes made using this widget will only affect the related store group, each group can have its unique look and feel.
Accessing Store Group Home Widget
To access the Home Widget for your store group, follow these steps:
Navigate to Store Grouping: Go to the settings of your account that manages store groupings. Manage Store Groups: Within the Store Grouping section, locate and select the specific group you want to customize using the Home Widget.

Using the Home Widget
Design Main Page: You can design your store page by adding and arranging elements such as images, text blocks, and other types of content. This allows you to create a visually appealing storefront tailored to your needs. CKEditor: The Home Widget includes CKEditor, a powerful text editor that allows you to write code, customize layouts, and design your content exactly as you expect it. This gives you flexibility in how you present your store's details.
Managing Image Sequence for Store Groups
This guide will help you manage the sequence of rotating and pod images for your store group.
Upload and Assign Images
Go to your homepage widgets and upload the images you want to use. Assign these images to the relevant store group.
Access Admin Panel Settings
Sign in to your admin panel. Find the "Store Grouping" section in the settings menu.
Update Image Sequence
Find the Image Sequence Tab: Look for the tab labeled Rotating Images and Pod Images Sequence.
For Rotating Images:
Here, you can choose which image to display first. Drag down and up the images to set their order.
For Pod Images:
Do the same for pod images. Choose the order in which you want them to appear.
Last Step: Save Changes
Once you’re happy with the image sequences, make sure to save your changes.