Manage Users
From the left navigation pane, select the Manage Entities menu item, then select “Users & Customers”.
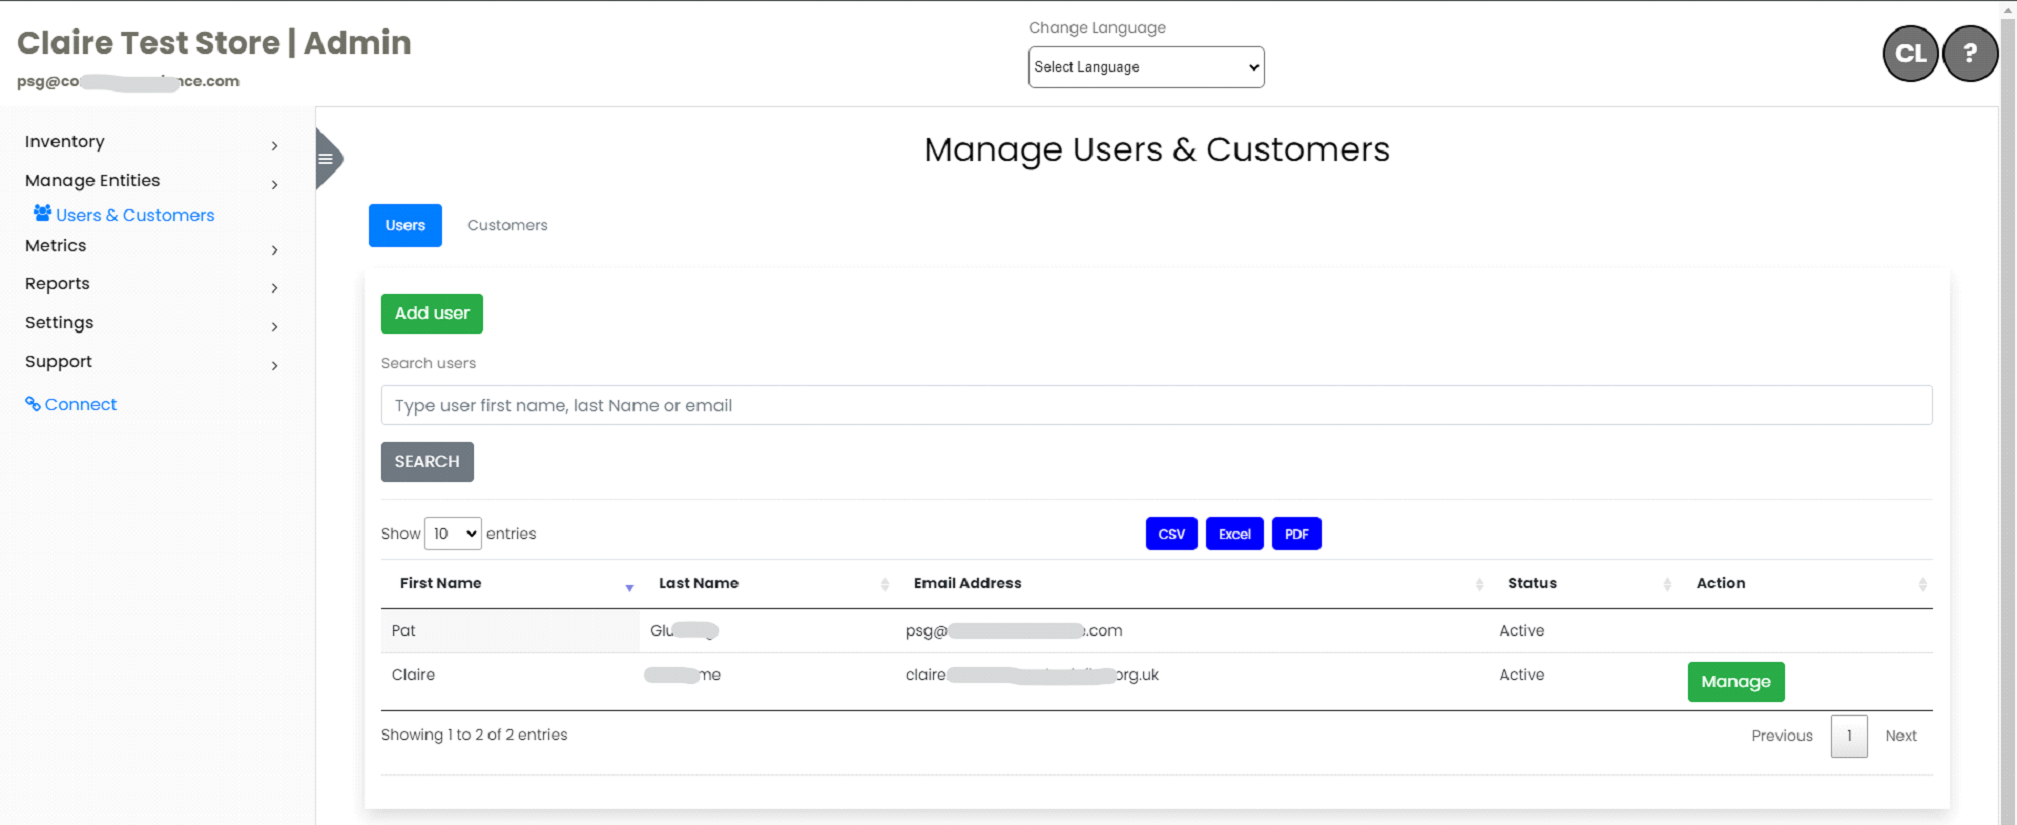
Search options are available. You may search by First Name, Last Name, or Email Address.
The list of Users can be exported to CSV, Excel, or PDF by clicking the respective button.
Add New User To add a new user, click the “Add New User” button at the top of the Manage User’s table.
This directs you to a form where new users can be added.
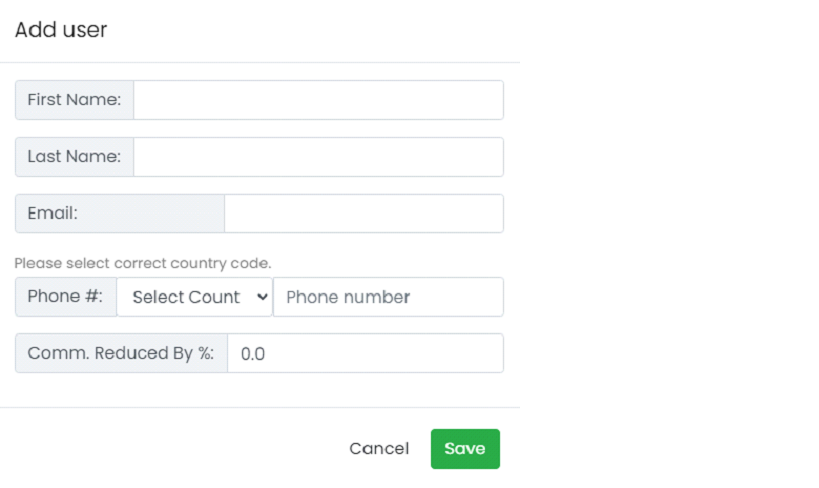
- Fill in both First Name and Last Name fields on the “Add New User” form.
- Enter the user’s Email Address.
- Enter the user’s Phone Number, selecting the correct Country Code.
- If applicable, you can change the Commission Reduced By %, which will default to 0.0. This field will not apply to most Users.
- Click “Save” to save your changes or “Cancel” to exit the form without saving changes.
Manage User Information
To view or edit the User information, click on the Manage button.
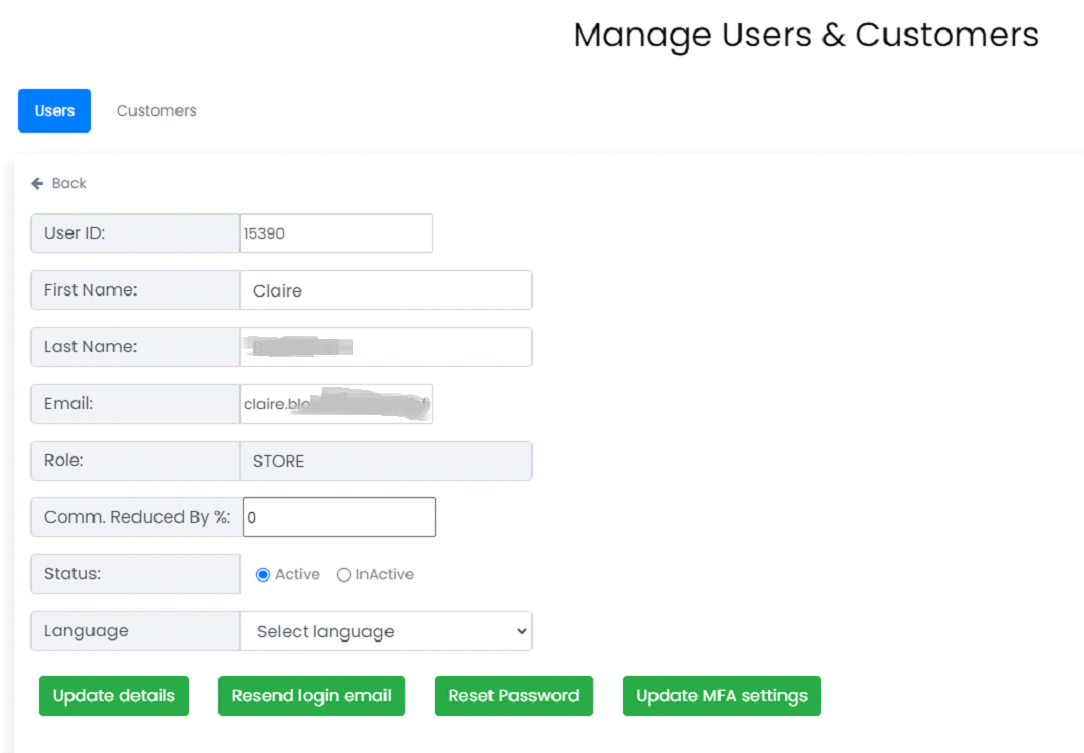
You may edit the user’s First Name, Last Name, Commission Reduced %, Status (Active or Inactive) and website Language. If you make any changes, click the Update Details button to save the information. If you do not make any changes, simply click the Back arrow at the top of the form to return to the list of Users. You will also find additional buttons at the bottom of the form that can be used to manage Users.
Resend Login Email
Click on this button to resend a User the email that contains specific instructions for logging in to their account.
Reset Password
Click on this button to reset a User’s password. This will reset the password to the Default Password. After resetting a User’s password, be sure to then Resend the Login Email to provide specific instructions to restore login access to their account.
Update MFA Settings
If Multi-Factor Authentication is enabled on your platform, clicking on this button will allow you to update the telephone number and status for a User.
Removing a User
To remove a User, click on the Manage button for the respective User. You can then change the User Status to Inactive and click Update Details to save. Users are not deleted from your portal but are listed as Inactive. This will allow you to restore access easily if necessary.