Inventory Upload Process
New Inventory and Bulk Update Upload Process
This documentation provides step-by-step instructions for uploading inventory via CSV file and monitoring the progress by the queuing system. It also covers Images error handling and re-uploading processes. The same steps apply to both new inventory upload and bulk update.
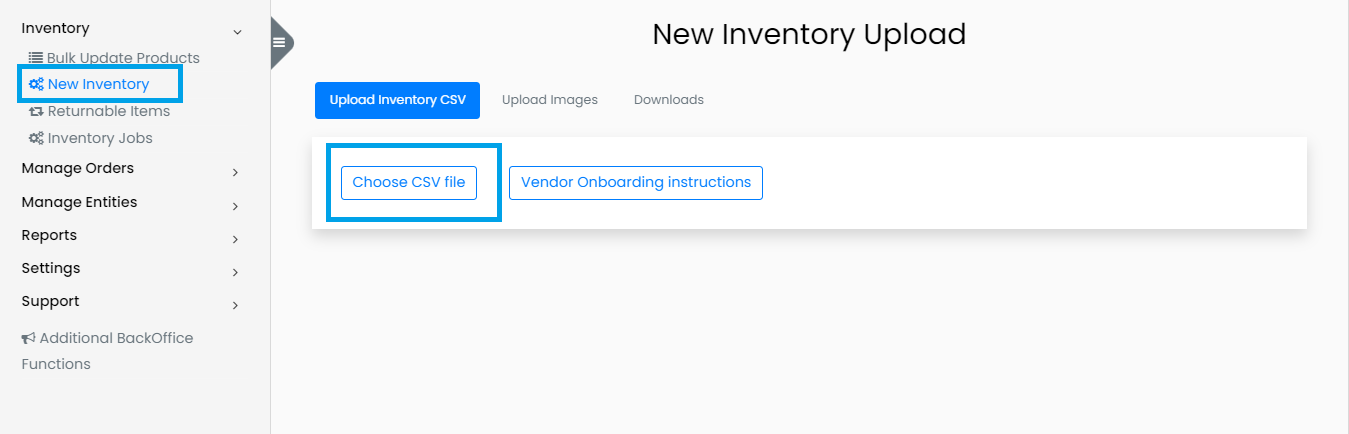
Open New Inventory
- Go to the Admin "Open New Inventory" section.
- Upload your CSV file.
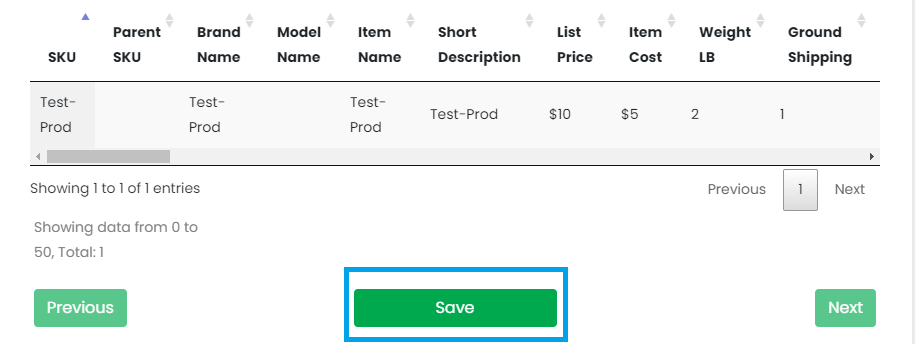
 * Click on "Save & Schedule" button to initiate the upload process.
Confirmation Message
- After saving, you will receive a confirmation message:
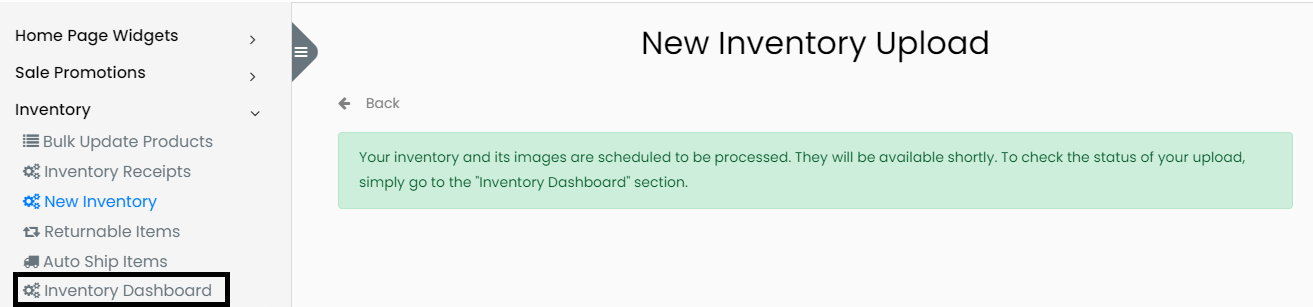 * To check the upload status, navigate to the "Inventory Dashboard" section.

Check Upload Status
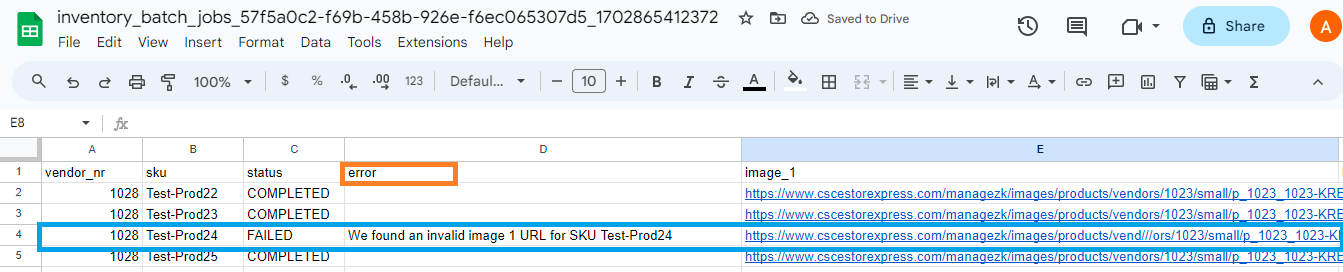
- In "Inventory Jobs," locate your recent file upload. The most recent one will be at the top.
- If status show "Completed," your file all SKU's uploaded successfully.
- If any product image are in "Failed," there are errors in the SKU. Download details to identify and fix errors.

In the inventory job report [Details], you'll see:
Vendor No.
SKU
Status (Completed or Fail)
If any products failed, read the associated error for details.
Dealing with Errors.
- If there are errors, a "Failed" status will be visible under the details.
- Click on "Details" to view the specifics of the error.
- If errors are found, fix them in the same detailed file.
- Correct the errors in report sheet.
- Click on your job re-upload,
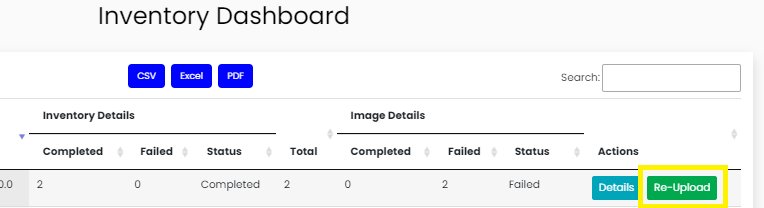
- Upload the detailed file in re-upload, which you downloaded just to see the errors and then correct in the same details sheet.
- The system will start running your fixed SKU's Images again, and you'll be able to observe the failed products moving one by one into the "Completed" status.
Note:
High resolution images may take some time to upload. If the status shows 'Scheduled', it indicates that the files are currently queued for processing.