Documentation: How to Create Placeholders in the Admin Panel
This documentation will guide you step-by-step on how to create placeholders in your system. Placeholders are useful in email campaigns, as they allow dynamic content to be inserted automatically when the email is sent out.
Step 1: Access the Admin Panel
- Log in to the Admin Panel of your platform.
- Navigate to the Store Grouping section, which is usually located in the main menu.
Step 2: Create or Choose a Store Group
- Once in the Store Grouping section, you can either:
- Create a New Store Group: If no store group exists for your placeholder, create a new one.
- Click Add New Store Group.
- Provide the necessary details such as the Name of the store group.
- Select any other options as required.
- Choose an Existing Store Group: If there is already an existing store group where you want to add the placeholder, simply click on the group name.
- Create a New Store Group: If no store group exists for your placeholder, create a new one.
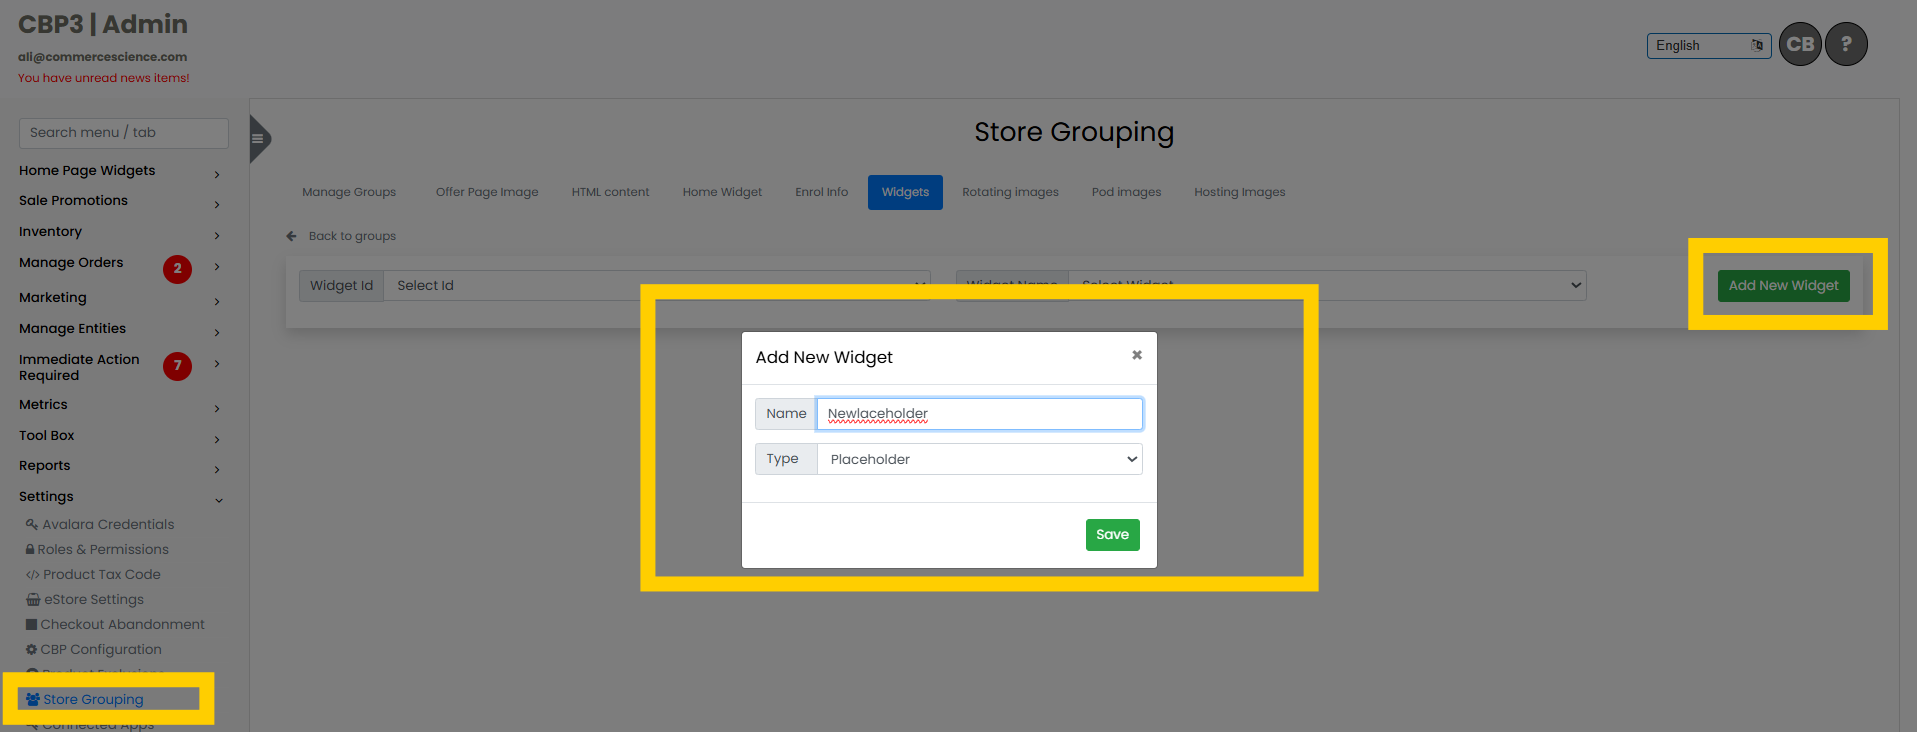
Step 3: Add a Widget to the Store Group
- After selecting or creating the store group, click on the Widgets tab (usually located on the sidebar or under the store group's settings).
- Click Add New Widget to create a new widget for your placeholder.
- In the pop-up or new screen:
- Give the Widget a Name: This is an internal name for reference (e.g., "Email Placeholder").
- Select Widget Type: From the dropdown menu, select the widget type called "Placeholder".
- Click Save.
Step 4: Load the Created Widget
- Once the widget has been created, you will see it in the list of available widgets for your store group.
- Click on the newly created widget to open its settings.
- You will be presented with an option to Select Widget ID. Choose the widget you just created (e.g., "Placeholder").
Step 5: Customize the Placeholder Widget
- After selecting the widget, you’ll see an input field where you can type in the placeholder value.
- You can enter dynamic content or variables here that will be replaced when used in email campaigns (e.g., {{first_name}}, {{product_name}}).
- You can also customize the HTML content, and add styling (CSS) to the placeholder.
- Use the HTML editor to format the content if needed.
- You can add specific styles using inline CSS or by linking to an external stylesheet, depending on your platform.
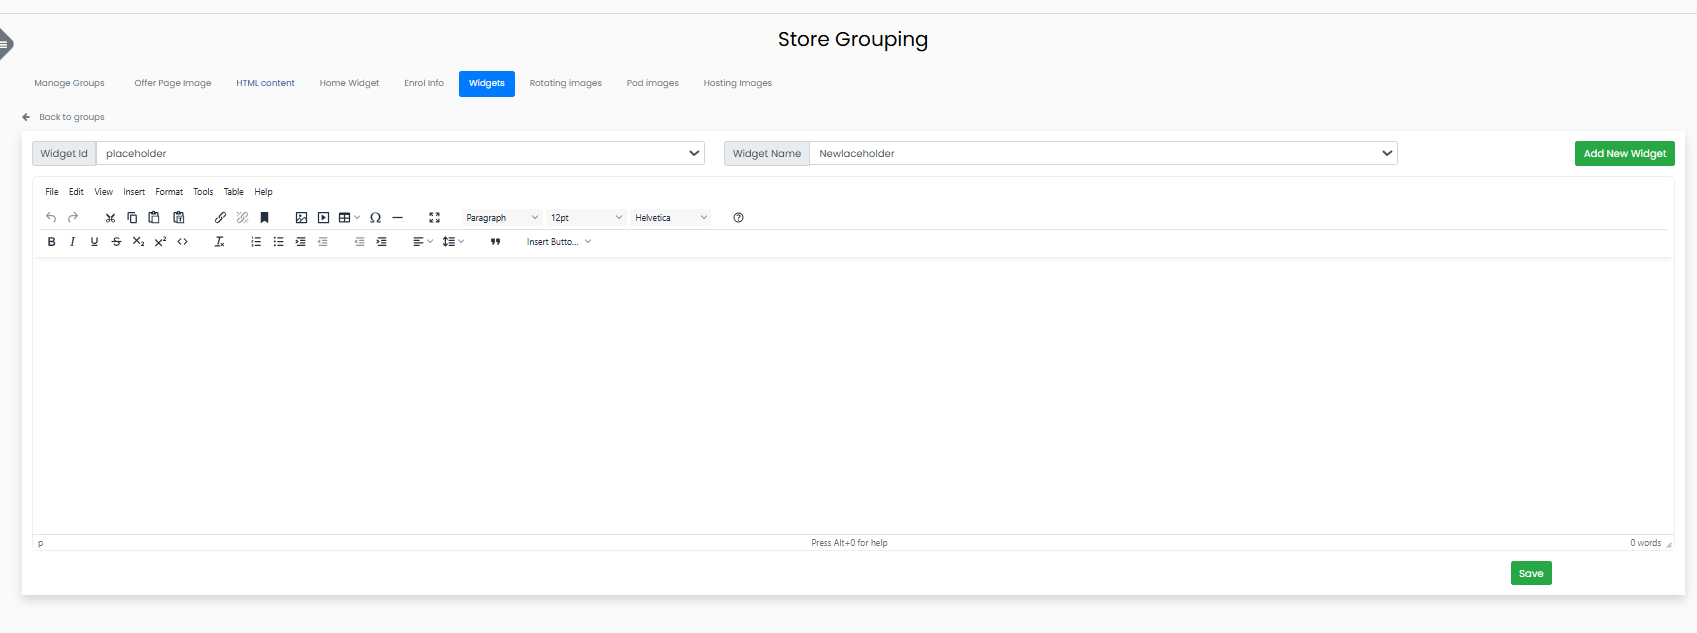
Step 6: Save the Placeholder Widget
- After completing the setup and customization, click Save to save the changes you’ve made to the placeholder.
Step 7: Use the Placeholder in an Email Campaign
- The placeholder you created can now be used in any email campaign.
- When designing the email content, simply insert the placeholder's ID (or name) in the appropriate location. The system will replace the placeholder with the corresponding dynamic content when the email is sent out.
Tips for Working with Placeholders
- Naming: Make sure the name of your placeholder is descriptive and easy to remember (e.g., "Customer First Name" or "Product Discount").
- Testing: Test your email campaigns by sending a sample email to yourself to verify that placeholders are working as expected.
How to Use the Placeholder in an Email Campaign
Once you've created a placeholder, you can use it in any email campaign by following these steps:
Step 1: Access Sponsored Marketing
- Log in to your Admin Panel.
- Navigate to Sponsored Marketing in the main menu.
Step 2: Open Email Templates
- In the Sponsored Marketing section, go to Email Templates.
- Click on Groups to open the email template groups.

Step 3: Add the Group with the Placeholder
- In the Groups section, you’ll see a list of available email template groups.
- Add the group in which you created the placeholder by selecting it from the list.
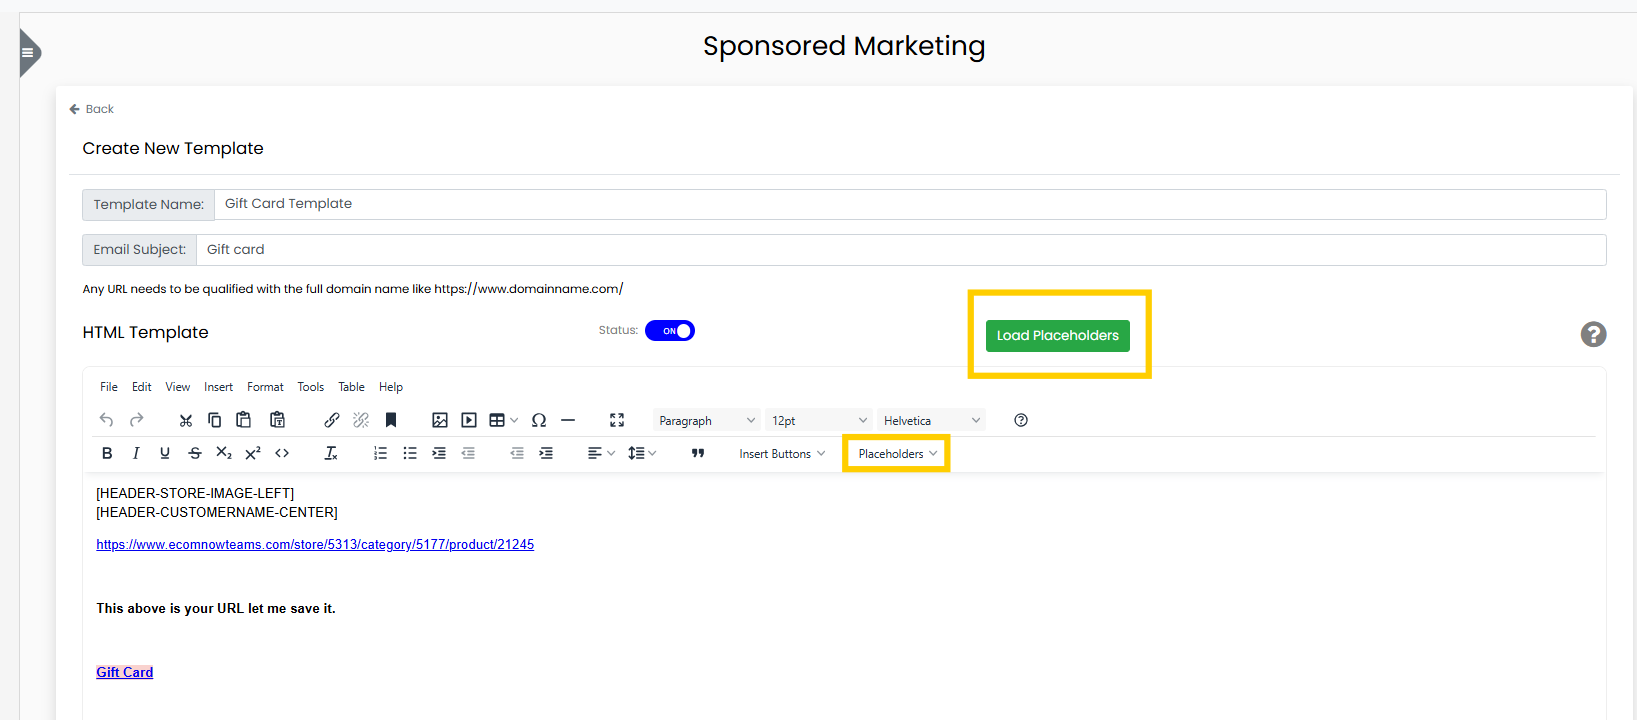
- Once the group is added, click View and Update for the email template you want to work on.
Step 4: Load Placeholders in the Email Template
- After opening the email template, look for the Load Placeholders option at the top of the email editor.
- Click on Load Placeholders. This will load all the available placeholders for that email template.
Step 5: Insert the Placeholder into the Email
- Position your cursor where you want the placeholder to appear in the email body.
- Once the cursor is in place, look for the Placeholder option in the top menu.
- The name you gave to your placeholder (e.g., "Customer First Name", "Product Discount") will appear in this dropdown.
- Select the desired placeholder from the list.
- The system will automatically insert the placeholder at the cursor location.
Step 6: Save and Send the Email Campaign
- After inserting the placeholder(s), you can continue editing your email content.
- Once you're done, Save the email template.
- Proceed with sending the email campaign as usual. When the email is sent, the placeholder will be dynamically replaced with the corresponding content.
This concludes the steps on how to use a placeholder in an email campaign. If you have any issues or need assistance with placeholders, feel free to reach out to support.