Quickbooks Integration
Setting up OAuth 2.0
Before jumping to actual integration, first we need to set up OAuth.
Get OAuth 2.0 Credentials
To generate OAuth credentials customer, will need an Auth Redirect URI. The Auth Redirect URI for any domain will be as:
https://DOMAIN/ecom-qb/auth/oauth2redirect
Where DOMAIN is any of CBP domain, for example, for CSC, cbp 3 Auth Redirect URI would be:
https://www.cscestorexpress.com/ecom-qb/auth/oauth2redirect
Once we share the Auth Redirect URI, customer can generate OAuth credentials from their QB developer account.
Connect eComNow and Quickbooks
After generating the OAuth 2.0 Credentials, CBP Admin need to save and connect eComNow and Quickbooks. For that they need Login to Admin portal as Admin using admin link i.e. http://DOMAIN.com/admin
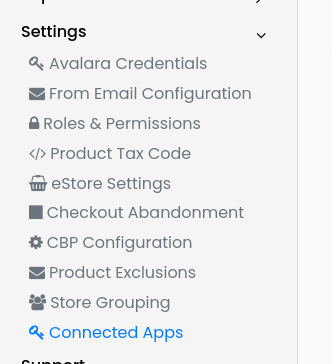
Select Connected Apps from Settings menu
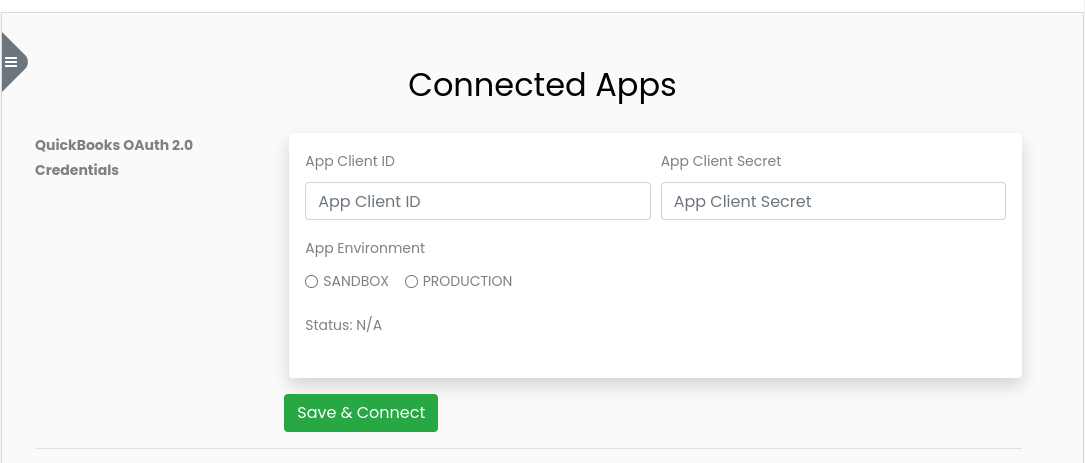
User need to enter the Client ID and Client Secret selected QB app environment and hit Save & Connect.
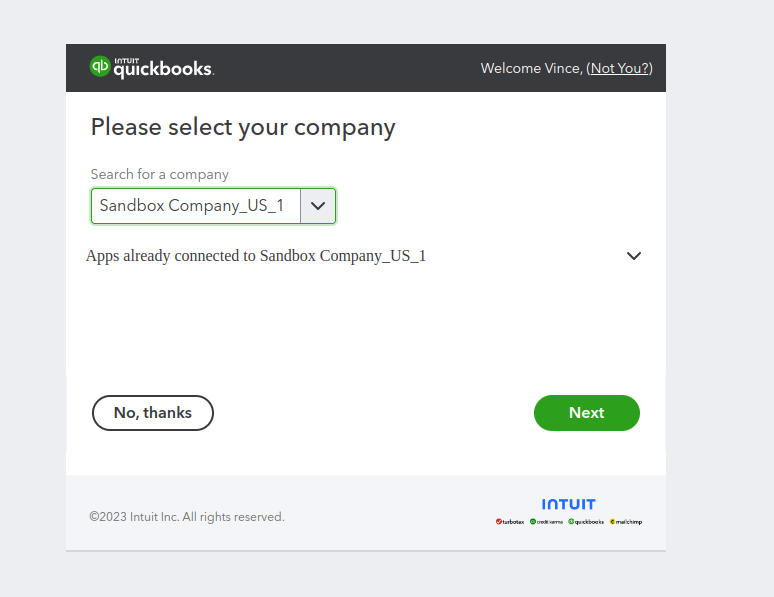
Upon saving the credentials, Quickbooks authorization page will appear and user needs to authorize the request.
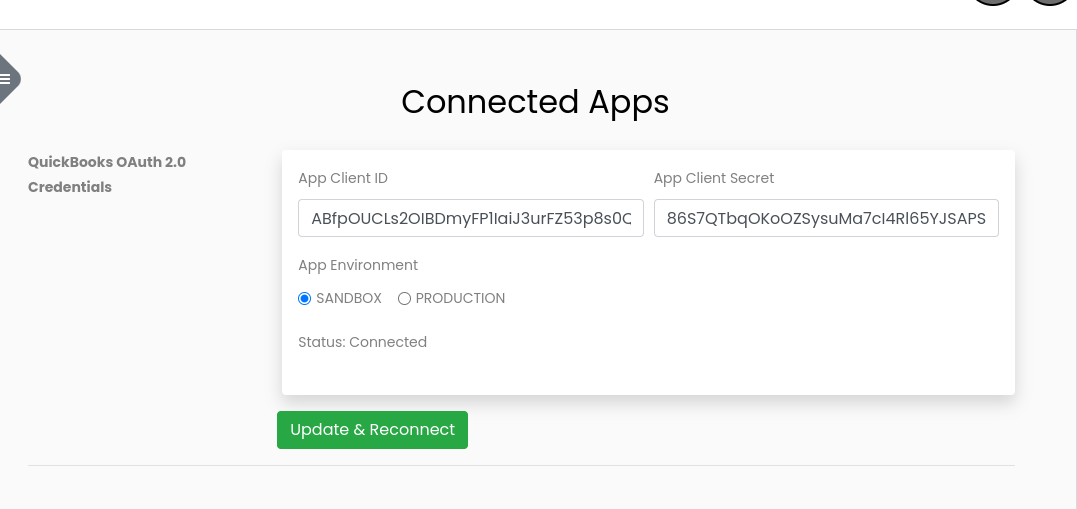
After successful authorization user will the redirected to Connected Apps page, where the connected status can be verified.
QuickBooks Accounting
After eComNow and QuickBooks are connected we can use QuickBooks UI function to create bills for vendors and scheduler jobs to create customer and reseller invoices and payments.
Vendor Bills
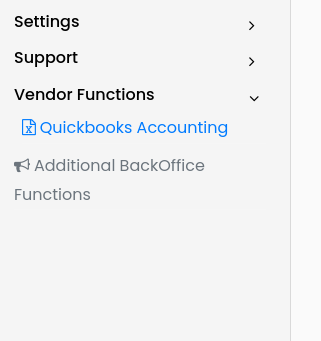
To create a vendor bill, users need to log in to admin portal. After login select QuickBooks Accounting from Vendor Functions menu
Here on this page we have two tabs
- Add a Single Bill
- Upload Bill(s) CSV
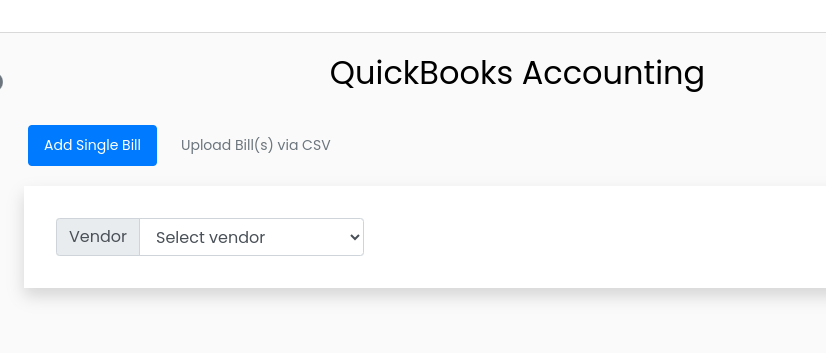
Add a Single Bill
Here we can create single bills on Quickbooks for vendors. From the dropdown, select a vendor and enter bill details and save. Bills are being validated saved on ecompaas databases before creating to QB. If a vendor does not exist on QB, system will create that vendor first and then create the bill(s).
-
Order no. — eComNow Order no for which the bill is being created
-
Bill no. — any random number this will be the bill no on QB
-
Bill must have at least one line item
-
An invoice file attachment can also be uploaded to QB along with the bill
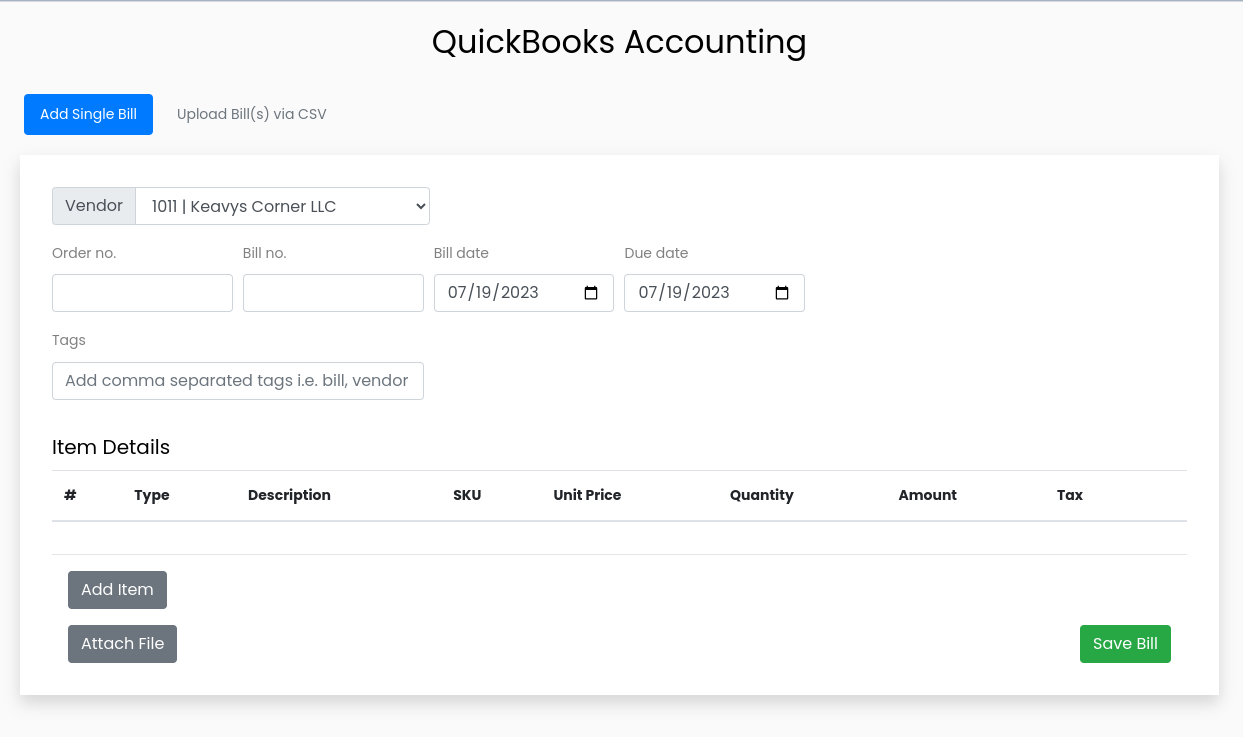
There are two type of line items at the moment:
- PRODUCT - For product line SKU, quantity and unit price are required
- Shipping - For shipping line only amount is required
After adding the line(s) user can save the bill.
Upload Multiple Bill(s) via CSV
A CSV file can also be used to create multiple vendor bills at once.
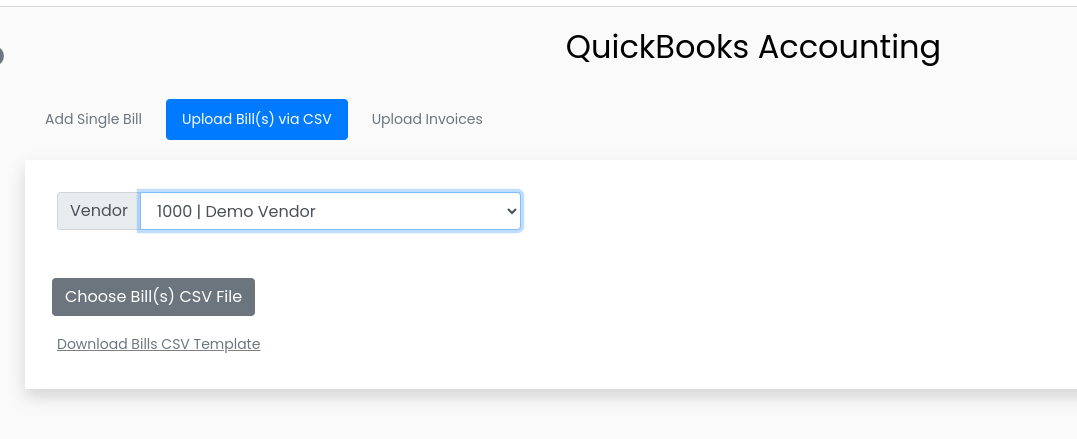
To upload bills CSV file, user first need to select the desired vendor and then attach the CSV file.
CSV template can be downloaded from the download link under Choose CSV file button. There are a couple of sample data rows available in the CSV template please remove them before entering the information.
If you need to attach invoices to each bill, please follow the next section Upload Multiple Invoices.
Upload Multiple Invoices
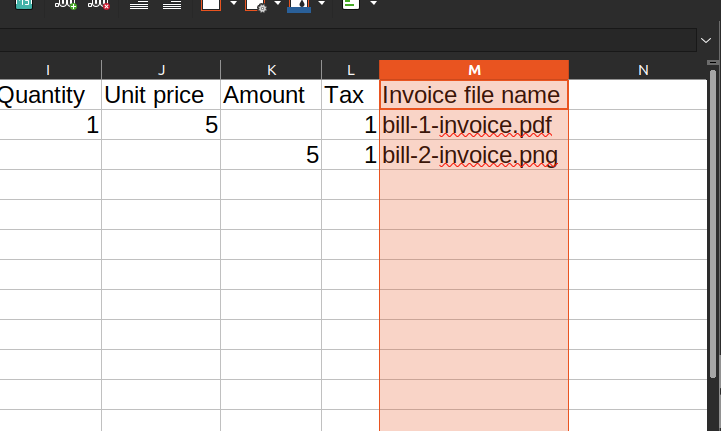
If a CSV file is being to upload multiple bills, you may need to attach bill invoices as well. To attach multiple bill invoices, you first need to upload invoices and then include the same file names in bills CSV file.
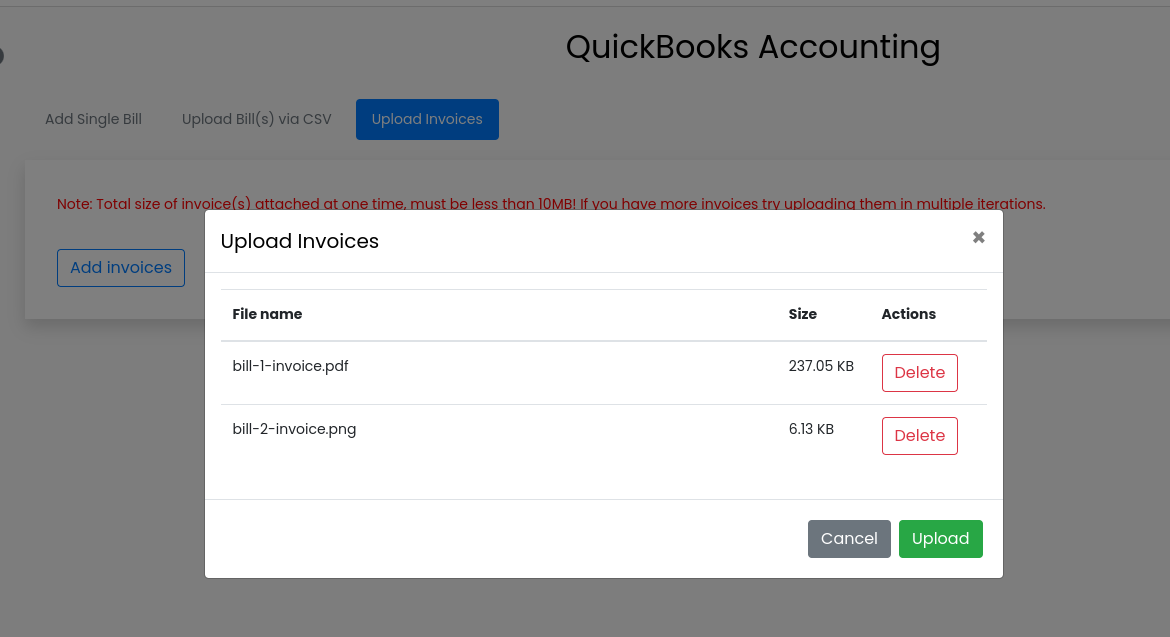
After uploading the invoices, please enter file names in CSV, each for a bill.
Scheduler Jobs
We have a separate service for Quickbooks APIs and Scheduler Jobs. Scheduled job runs after 24 hours and do following tasks:
- Vendor Bill Payment
- Customer Invoice & Payment
- Reseller Invoice & Payment
Vendor Bill Payment
This job runs every 24 hours and search for orders which has been closed (order_status = 3) and vendor bills submitted for them and payment has been made (order_payment_summary group_number not null). If any closed order with payment information it will submit payment details for existing vendor bill on Quickbooks.
Customer Invoice & Payment
This job runs every 24 hours. For each cbp which is connected to QB it finds the closed order of yesterday. For instance if CBP 3 is connected with Quickbooks it will search order_status =3 and reseller in cbp 3. If any closed order found this will create customer invoice on QB. If customer does not exists on QB system will create the customer first.
After creating customer invoice this job will create the customer payment based on order total.
Reseller Invoice & Payment
This job runs every 24 hours. For each cbp which is connected to QB it finds the closed order of yesterday. For instance if CBP 3 is connected with Quickbooks it will search order_status = 3 and reseller in cbp 3. If any closed order found this will create Reseller invoice on QB. If Reseller does not exists on QB system will create the vendor (Reseller) first.
After creating Reseller invoice this job will create the Reseller payment based on order total.