Roles & Permissions Management
Important Note
The Roles & Permissions module is strictly managed by the Admin role only. No individual user, store, vendor, accountant, or any other role is allowed to modify, create, or assign permissions.
This restriction ensures system security, proper access control, and prevents unauthorized changes to feature access across the platform.
Any required changes to roles or permissions must be requested from the Admin team, who will review and apply the changes if necessary.
Admin Panel --> Settings --> Roles And Permissions
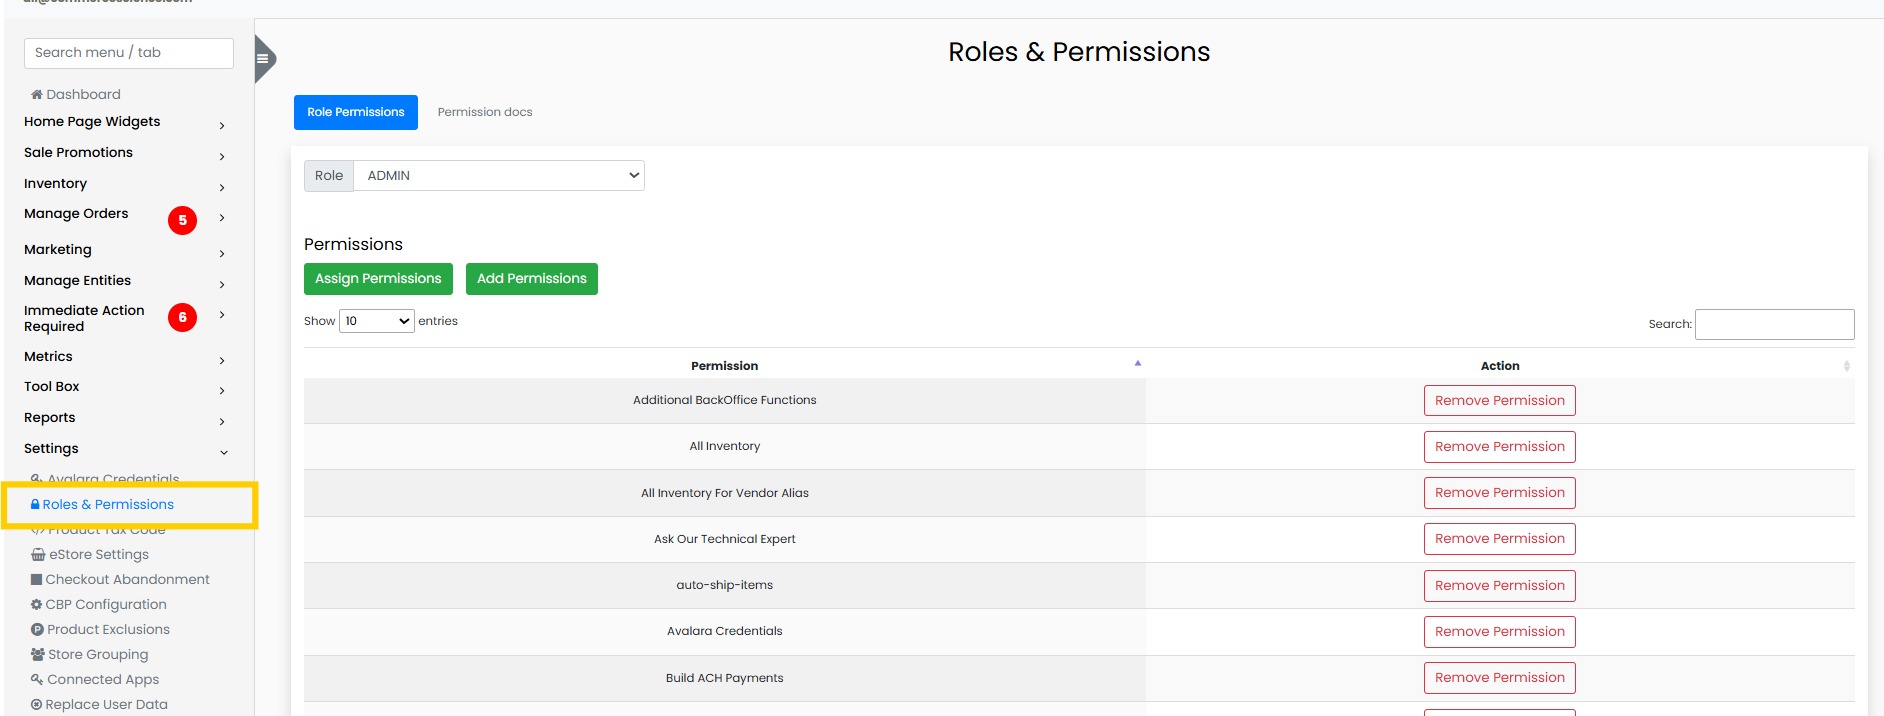
Overview
The Roles & Permissions module controls what features and sections of the system each user can access.
Instead of assigning access individually to each user, permissions are grouped into roles. Each user is assigned a role, and that role determines which features they can access in the system.
This approach helps maintain:
- System security
- Organized feature access
- Easier user management
- Controlled administrative operations
Available Roles
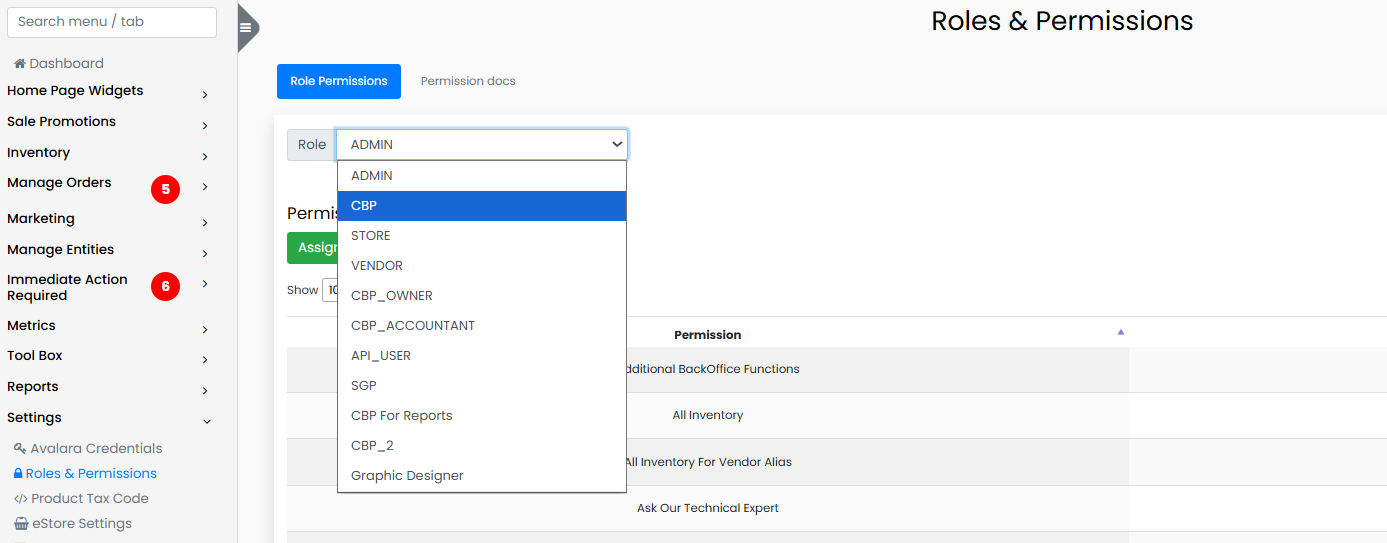
The system currently supports the following roles:
| Role | Description |
|---|---|
| Admin | Full system access with permission to manage all modules, users, and configurations |
| CBP Store | Access to store-level operations and store-related features |
| Vendor | Access for vendors to manage products, orders, and vendor-specific tools |
| CBP Owner | Owner-level permissions with access to operational and business reports |
| CBP Accountant | Access mainly to accounting, payments, deposits, and financial reports |
| API User | Used for system integrations and API-based operations |
| SGP Graphic Designer | Access related to graphics, media, and marketing content |
| CBP for Reports | Role dedicated primarily to viewing reports and analytics |
System Screens
The Roles & Permissions system consists of two main screens:
- Permission Docs
- Role Permissions
Each screen serves a different purpose in managing system access.
Permission Docs
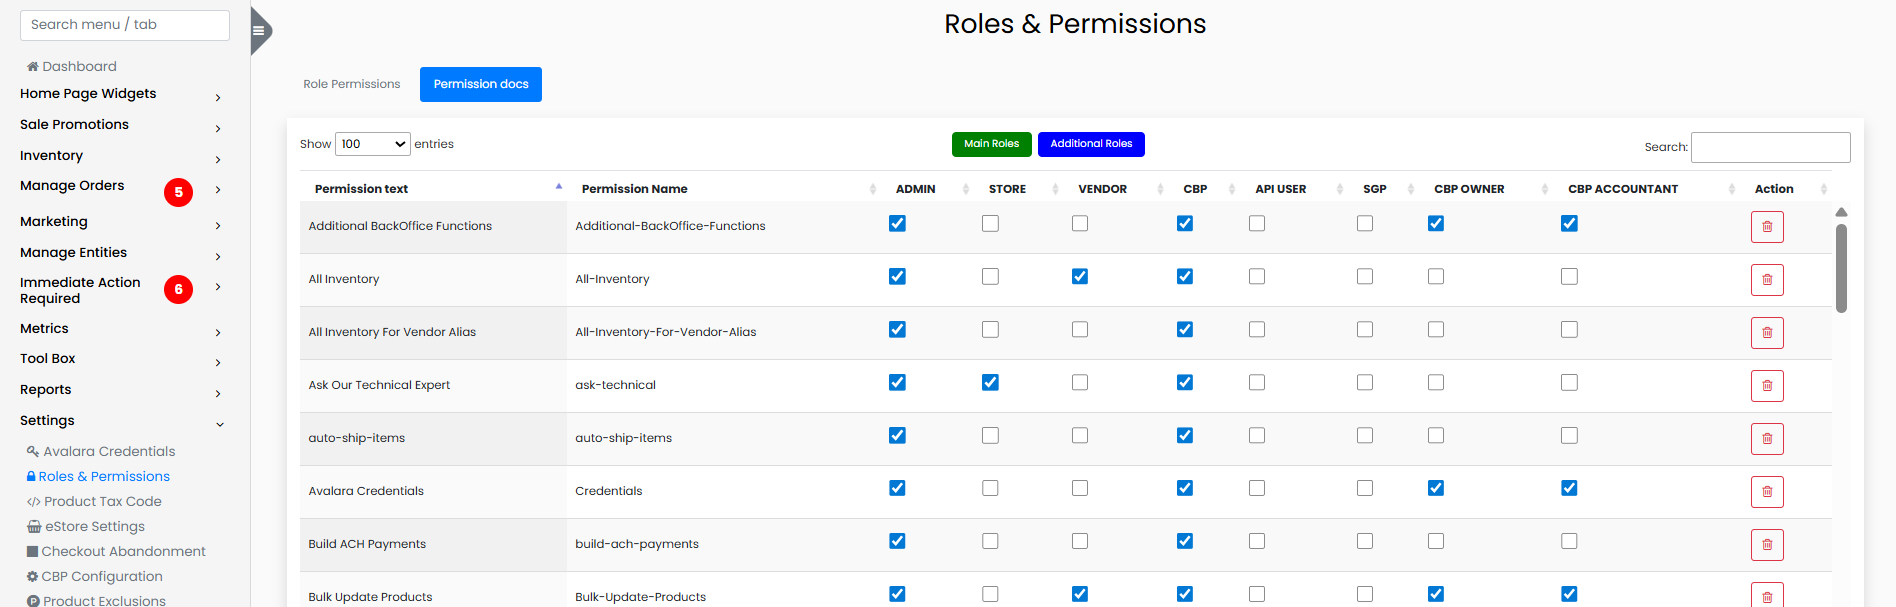
Purpose
The Permission Docs screen acts as the master list of all system permissions.
Each feature or page within the system is represented by a permission entry. From this screen, administrators can control which roles are allowed to access specific features.
Permission Table Structure
The Permission Docs table contains the following columns:
| Column | Description |
|---|---|
| Permission Text | Human-readable name describing the feature or module |
| Permission Name | Unique internal identifier used by the system |
| Admin | Checkbox to allow Admin role access |
| Store | Checkbox to allow Store role access |
| Vendor | Checkbox to allow Vendor role access |
| CBP | Checkbox for CBP related roles |
| API User | Checkbox for API access |
| SGP | Checkbox for SGP Graphic Designer access |
| CBP Owner | Checkbox for owner-level permissions |
| CBP Accountant | Checkbox for accountant role permissions |
| Action | Used to update or manage the permission |
Each row represents one system permission.
Administrators can check or uncheck roles to control which roles can access that specific feature.
Example Permissions
Below are some example permissions used in the system:
| Permission Text | Permission Name |
|---|---|
| Dashboard | dashboard |
| Products | products |
| Manage Customers | Manage-Customers |
| Vendor Orders | Vendor-Orders |
| Email Templates | email-templates |
| Inventory Dashboard | Inventory-Dashboard |
| QuickBooks Accounting | QuickBooks-Accounting |
| Roles & Permissions | Roles-Permissions |
Managing Permission Access
To modify role access from the Permission Docs screen:
- Navigate to Permission Docs
- Locate the desired permission
- Check or uncheck the roles that should have access
This allows administrators to quickly manage role access to system features.
Steps to Assign Permissions
- Open Role Permissions
- Select the Role from the dropdown
- Choose one of the following options
Assign Permission
The Assign Permission option allows administrators to:
- Select existing permissions
- Assign them to the selected role
Add Permission
The Add Permission option is used to create a new permission.
When adding a new permission, the following fields must be provided:
| Field | Description |
|---|---|
| Permission Name | Display name for the permission |
| Permission Text | URL Path |
Once created, the permission automatically becomes available in Permission Docs, where role access can be configured.
Avoid Duplicate Permissions
Before creating a new permission, check whether a similar permission already exists.