eComNow — Get Started Guide
Welcome to eComNow!
This guide will help you create your store, log in to the admin portal, configure payments, and manage users — step by step, in plain language.
What This Guide Covers
By the end of this guide, you will know how to:
- Enroll and create your eComNow store
- Log in to the Admin Console
- Complete initial store setup
- Configure your merchant (payment) account
- Add additional users
- Contact support when needed
Enrollment — Creating Your eComNow Store
To begin, use the Get Started link provided by eComNow.
Steps
- Open the Get Started link.
- Complete all required fields, including:
- Store or organization name
- Primary contact information
- Business details
- Submit the form.
Once submitted, your store is created in an under construction state and is not yet public.
Enrollment Emails
After completing enrollment, check your inbox (and spam folder).
You should receive three emails:
-
Welcome! Please Verify Your Email
Confirms your email address. -
Login Instructions to Your eComNow Admin Portal
Contains your login link and credentials. -
Your New eComNow Store Is Ready for Deployment
Confirms successful store creation.
Logging Into the Admin Console
- Open the eComNow Admin Portal using the link from your email.
- Log in with your provided email and password.
- You will arrive at the Admin Dashboard.
Initial Store Setup
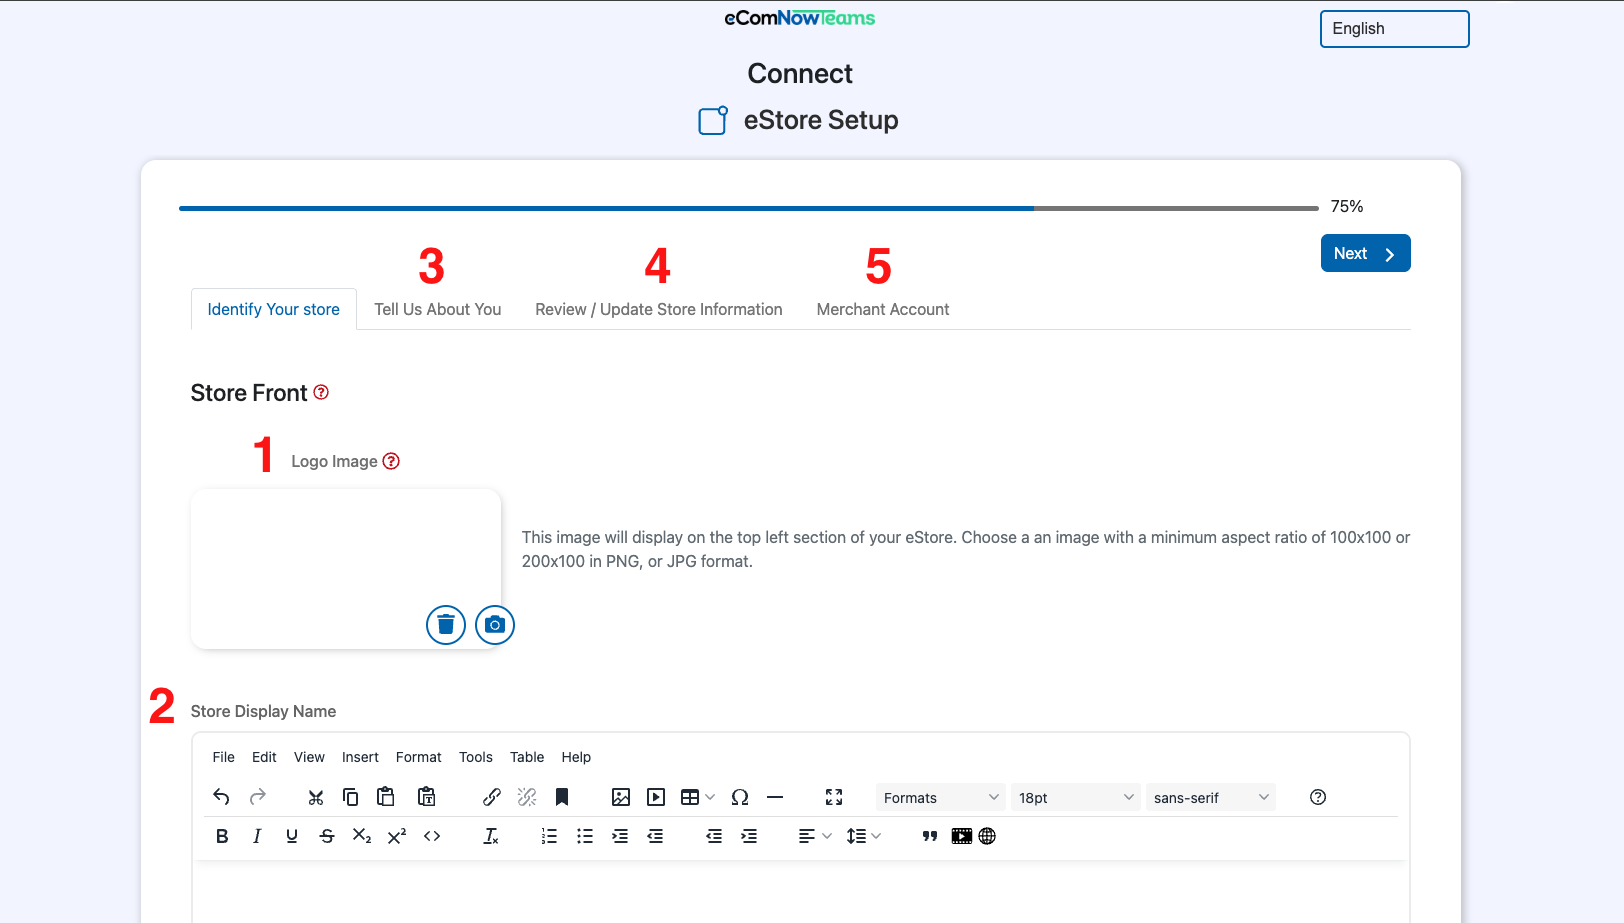
After logging in for the first time, complete the basic setup fields.
Required Information
-
Store Logo
Upload your brand or organization logo. -
Store Display Name
This is the name customers will see. -
About Your Store
A short description explaining who you are and what you offer.
This information personalizes your store and builds customer trust.
Merchant Account (Payment Setup)
To accept payments, you must configure your Merchant Account.

Setup Steps
- Open the Merchant Account section in the Admin Console.
- Review any pre-filled information.
- Complete all required fields.
- Submit the form.
Security Information
- Banking information is securely encrypted.
- Sensitive data is not stored on eComNow servers.
- Submitted banking details cannot be viewed or retrieved later.
Tax-Exempt or Special Organizations
If your organization does not have traditional ownership (such as a nonprofit),
a responsible representative must complete the required fields.
User Management — Adding Additional Users
You can allow others to help manage your store.

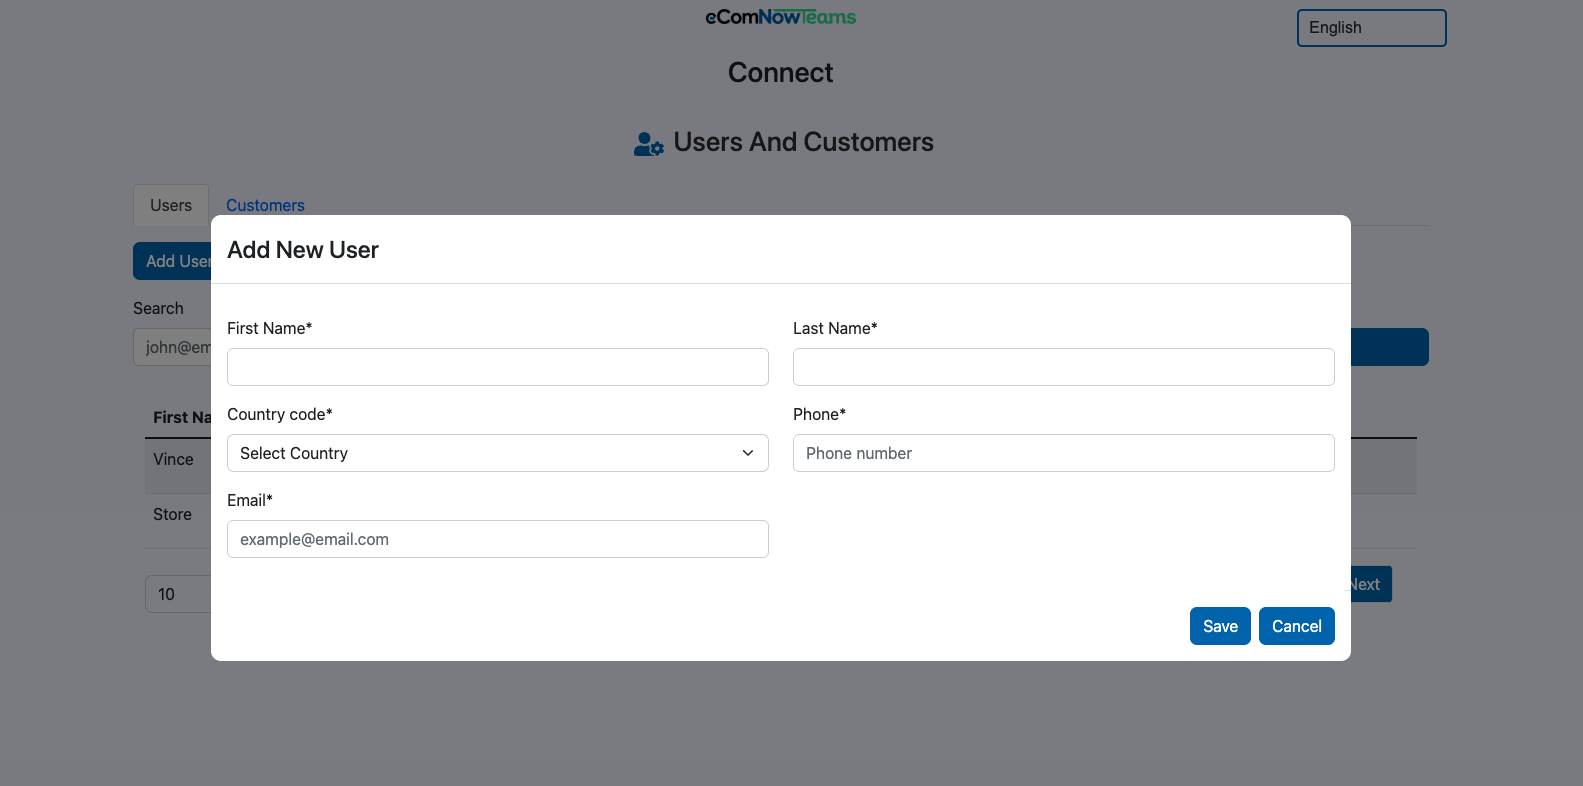
Add Users from the Admin Console
- Navigate to Users & Customers.
- Enter the new user’s details.
- An invitation email will be sent automatically.
Add Users via Support
If you prefer assistance, contact support and request user access.
Support & Help
If you need help at any point:
Email: support@ecomnow.com
Support can assist with: - Account access issues - Merchant account setup - User management - General onboarding questions