Documentation for eStore Setup (New) Module
Introduction
Welcome to the eStore Setup (New) Module.
This guide provides a detailed, step-by-step walkthrough to help you:
- Set up your online store
- Configure essential store information
- Complete your eStore profile
- Ensure your store is ready for customers
The setup process is structured and must be completed in sequence to ensure proper store configuration.
Important Setup Rules
Before proceeding, please carefully review the following mandatory requirements:
1. Sequential Completion Required
- Each section must be completed in order.
- You cannot skip any step.
- Access to the next screen is locked until the current section is successfully completed.
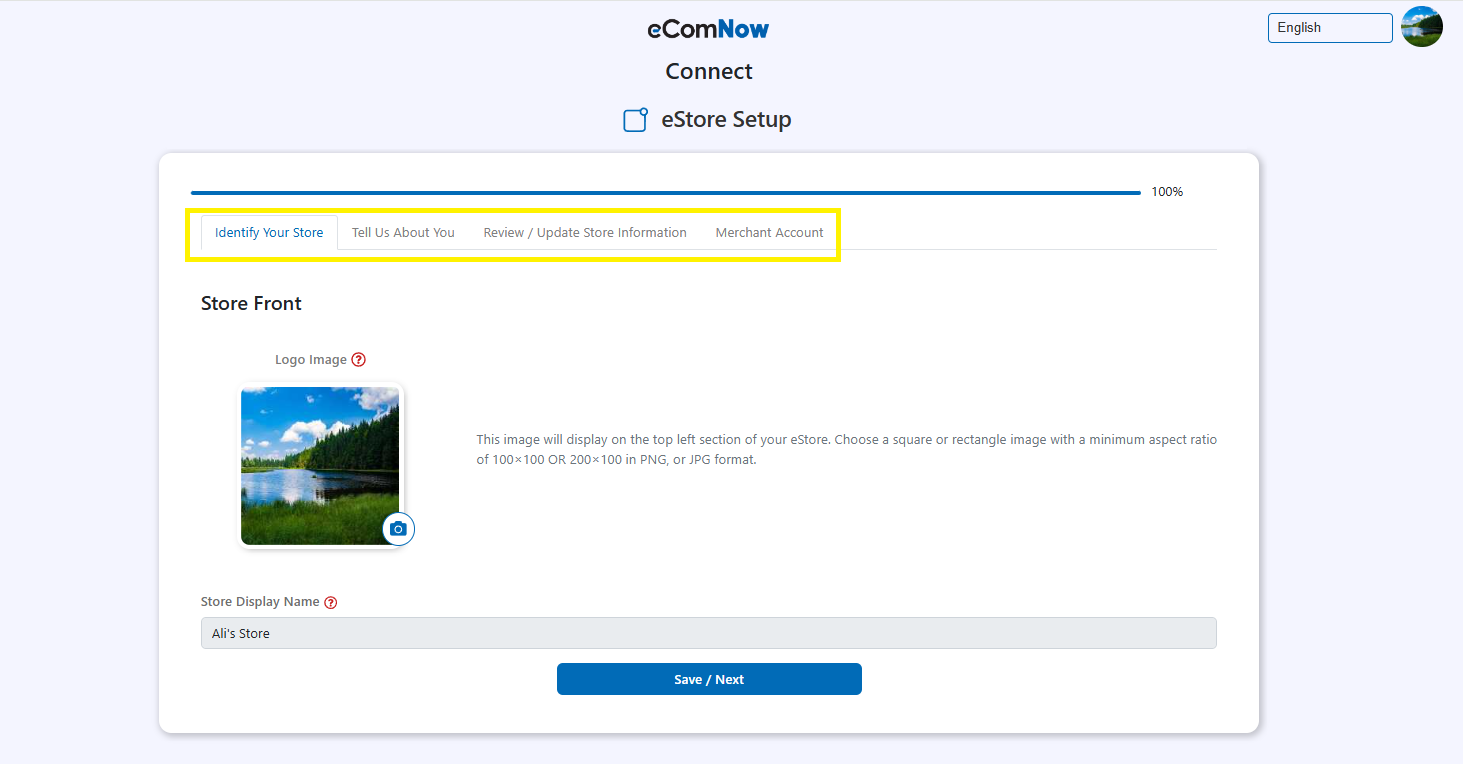
Here’s how the progress will appear: After completing the first section, your profile completion will show 25%. Completing the second section will bring it to 50%. After completing the final section, your profile will show 100% completion.
- Store Logo & Display Name Setup
- Tell Us About You (Store About Us Information)
- Review & Update Store Information
- Bank Details
Let’s explore each section in detail.
Store Logo & Display Name Setup
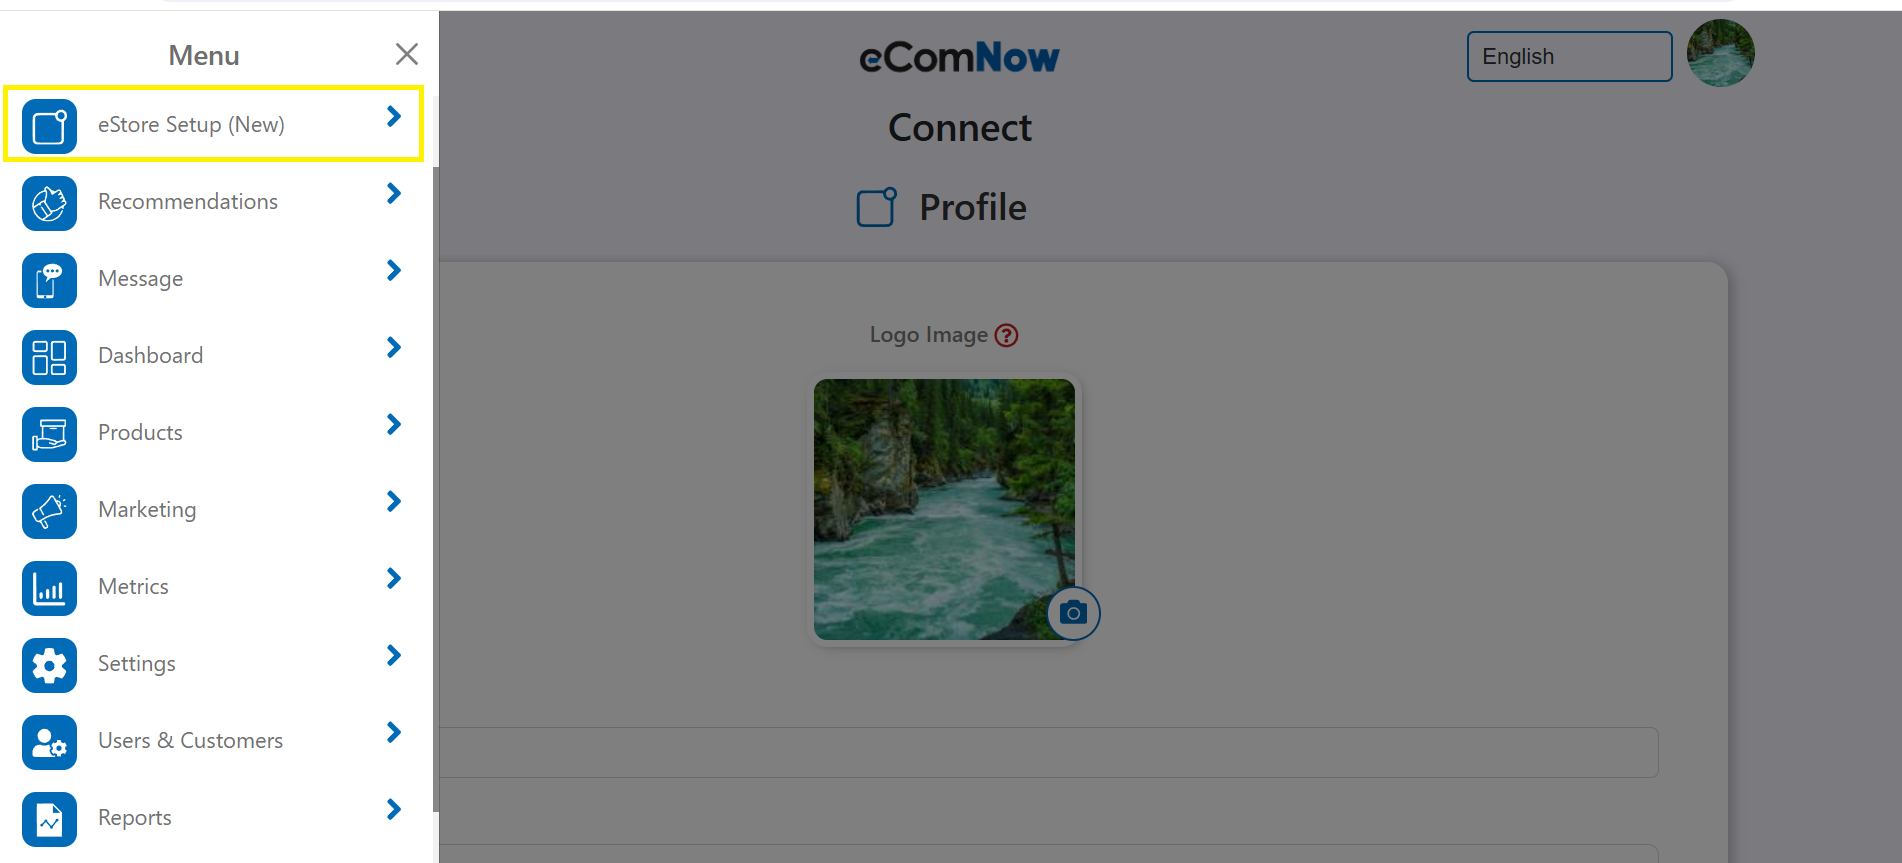
When you first enter the eStore Setup (New) page, you will see the following:
Store Logo: This is where you can upload your store's logo. To do this, click on the upload button and select the image file you want to use. The image should be in a supported format (JPEG, PNG,) Once the image is uploaded, it will appear next to your store name. How to upload the store logo: Click on the Upload Logo button. Choose the image file from your computer. Wait for the image to finish uploading. The logo will now display in the logo section.
Store Display Name: This is the name that will be displayed on your store’s . It should be the name of your business or eStore. This name is also displayed on the eStore Setup page for your reference. Mini Documentation: You will also notice a red question mark icon next to the Store Display Name. This icon provides a mini-documentation for better understanding of the eStore setup process. Simply click on the icon to view a concise guide explaining of the setup page. After uploading your store logo and verifying the store display name, click Save and Next to proceed to the next step.
Tell Us About You (Store About Us Information)
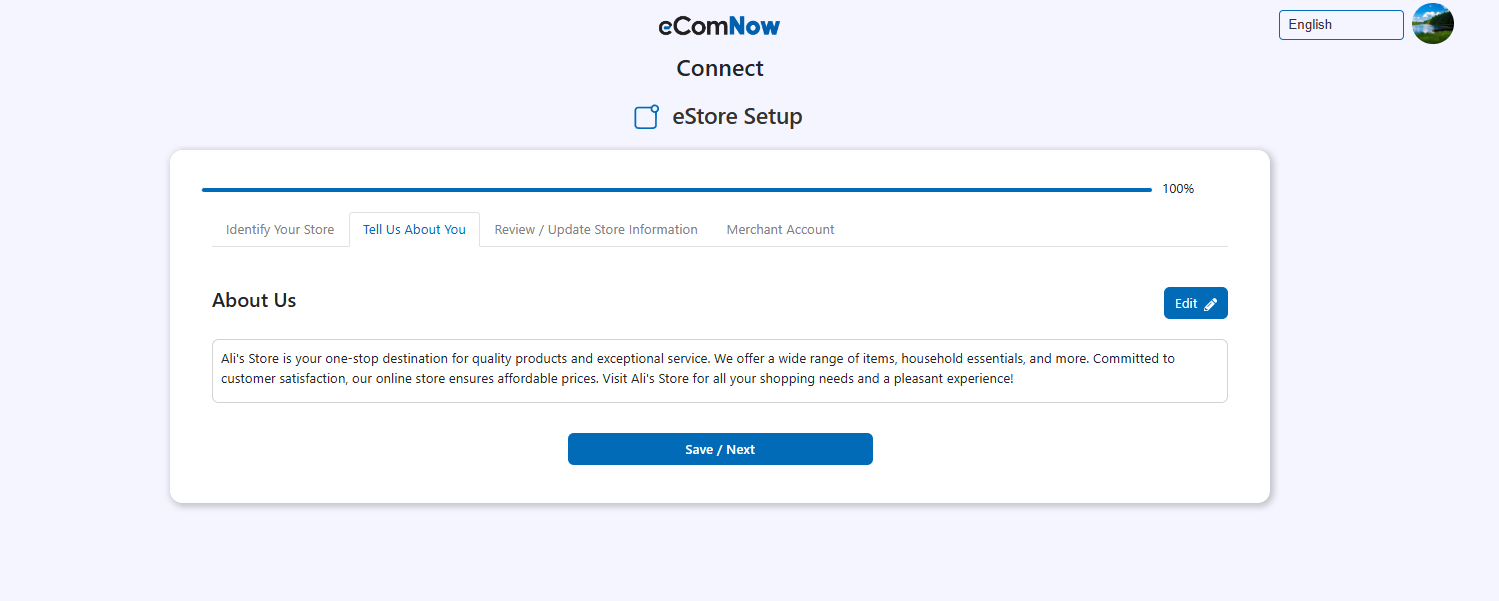
In this section, you will be able to add important details about your store, including an About Us section, images, and HTML customization. Here’s how you can manage this: About Us Information: Here you can write a description of your store. This could include your store's story, mission, products, or anything you want your customers to know. You can format the text, add bullet points, and use headings to structure the content. Add Images: You can upload images to be displayed alongside the "About Us" information. This could be pictures of your team, store, products, or anything related to your business. HTML Customization: For more advanced customization, you can add HTML code to design the "About Us" section in a way that suits your store’s branding. This could include custom layouts, styles, or embedded media (like videos or social media feeds). Once you're happy with your "About Us" section, click Save and Next to move to the next step.
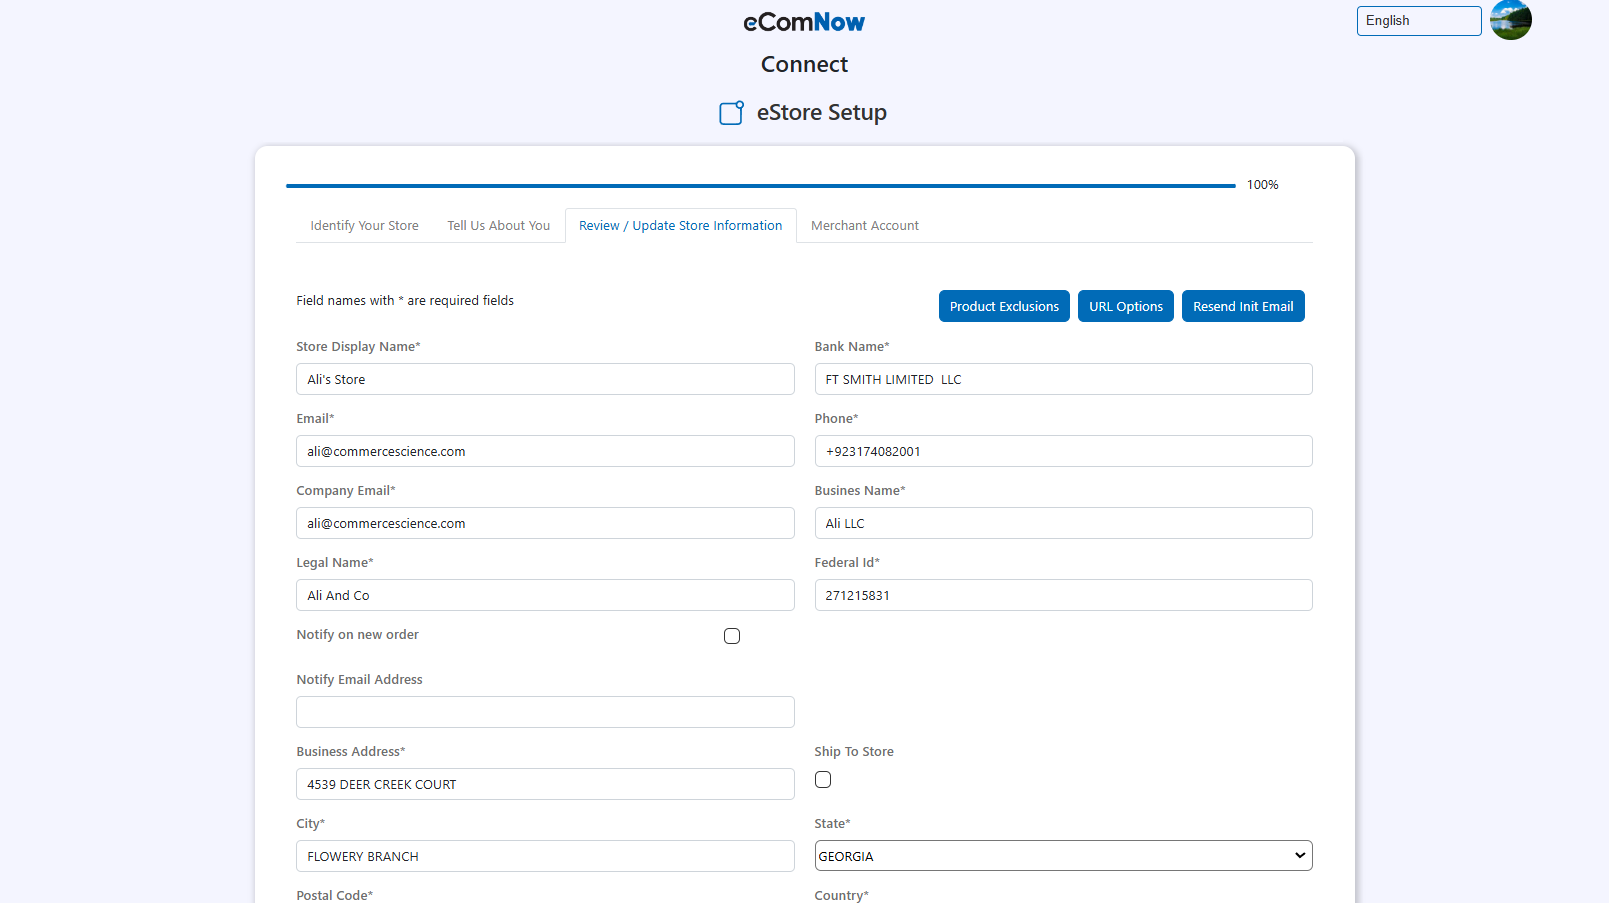
Review & Update Store Information
The Review & Update Store Information section is where you will enter and review critical information about your store, including contact details, address, bank names, and other important options. Here's a breakdown of what you’ll need to do: Basic Store Information: Store Name: Make sure your store name is correctly listed here. Contact Information: Enter your store's primary contact email address and phone number. This information will be used for communications related to your store. Store Address: Billing Address: This is the address used for billing purposes. Make sure it’s accurate for any future transactions. Shipping Address: This is where your store’s products are shipped from. Enter the correct shipping address. You will also see an option to enable or disable the "Ship to Store" feature, which allows customers to ship their orders to your store. You can choose to allow or disallow this feature based on your business model.
Additional Options – Detailed Configuration Guide
Product Exclusions
The Product Exclusions section allows you to control which products are available for sale in your eStore. This feature helps you manage inventory visibility, maintain brand positioning, and customize your store offerings.
You can exclude products using the following filters:
1. Vendor-Based Exclusion
- Exclude all products supplied by specific vendors.
- Useful if:
- You no longer work with a vendor.
- You want to limit supplier visibility.
- Certain vendors do not align with your store strategy.
2. SKU-Based Exclusion
- Exclude products using specific SKU (Stock Keeping Unit) numbers.
- Ideal for:
- Removing discontinued items.
- Hiding out-of-stock products.
- Blocking specific variations of a product.
3. Brand-Based Exclusion
- Prevent products from selected brands from appearing in your store.
- Helpful when:
- You want to focus on preferred brands.
- You have brand restrictions.
- You want to refine your product catalog.
Note: Product exclusions only affect visibility in your store. Excluded products will not be available for customers to purchase.
URL Options
The URL Options section allows you to define how customers access your eStore online.
You can choose between the following options:
1. Own Domain (Custom Domain)
If you already own a domain name, you can connect it to your eStore.
Benefits: - Stronger brand identity - Professional appearance - Easier customer recognition - Improved marketing consistency
Setup Overview: - Enter your custom domain in the provided field. - Follow DNS configuration instructions (if required). - Confirm domain linkage once verified.
2. Masked URL
If you do not have a custom domain, you can use a masked URL.
What This Does: - Displays your store under a customized name. - Hides the default eStore system-generated URL. - Provides a cleaner, branded appearance without purchasing a domain.
This option is ideal for new store owners who want branding flexibility without managing domain settings.
Resend Initial Email
The Resend Init Email feature allows you to resend your original account credentials to your registered email address.
When to Use This Option:
- You did not receive your initial setup email.
- You misplaced your login credentials.
- You need quick access to your username and password.
How It Works:
- Click the Resend Init Email button.
- A new email will be sent to your registered email address.
- The email will include:
- Username
- Password
- Login instructions
Ensure your email address on file is correct before using this option.
Bank Details Setup
The Bank Details Setup section is required for payment processing. This is where you configure how you will receive funds from your store sales.
Bank Account Configuration
Enter your banking information to enable direct payment deposits.
Required Information:
- Bank Name
- Account Holder Name
- Account Number
- Routing Number
- Any additional required banking identifiers
Steps to Add Your Bank Account:
- Enter your bank details in the provided fields.
- Carefully review all information for accuracy.
- Click Verify Details to confirm the banking information.
- Once verification is successful, click Connect Bank Account.
- Your bank account will then be linked to your eStore for payment processing.
Important: Incorrect banking details may delay payment processing.
Square Merchant Account Setup
If you use Square as your payment processor, you can connect your Square Merchant Account in this section.
Setup Process:
- Enter your Square merchant account credentials.
- Follow the authentication steps (if prompted).
- Confirm successful integration.
Once connected: - Payments processed via Square will be linked to your eStore. - Transactions will follow your configured Square payment settings.
Make sure your Square account is active and fully verified before connecting it to your store.
Final Notes
Completing all sections within Additional Options and Bank Details Setup ensures:
- Accurate product visibility control
- Proper store URL configuration
- Secure payment processing
- Smooth financial transactions