Managing-all-inventory
Summary: This documentation provides an overview of the All Inventory section in the Admin Panel, detailing how to view, manage, and update products efficiently. It covers features such as search functionality, bulk actions, product activation, quick edits, image management, and vendor-specific inventory search.
The All Inventory section in the Admin Panel is designed to help you view, manage, and update your entire product inventory efficiently. This documentations provides a overview of the features and functionalities available in this section.
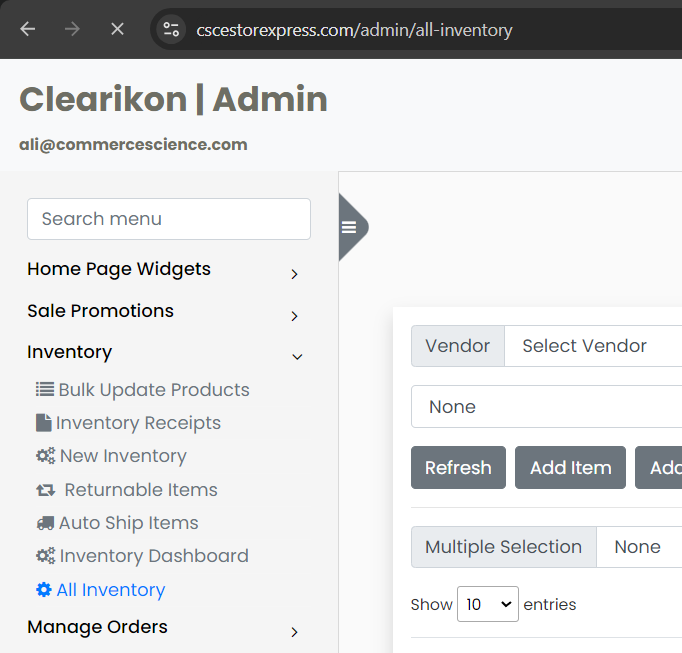
- To Locate:
- Login to Admin Panel
- Go to Inventory in side menu
- Open All Inventory
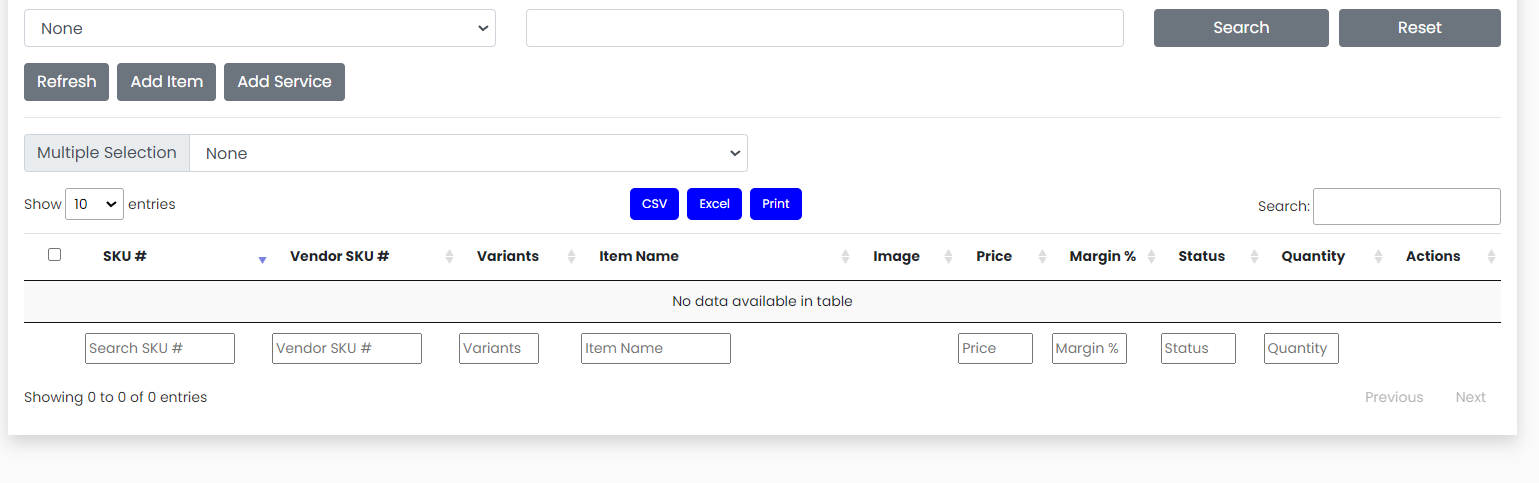
Display Columns
Each product in the inventory is displayed with the following columns:
- SKU: A Unique code assigned to each product.
- Vendor SKU: An identifier provided by the vendor, which may differ from the internal SKU.
- Variants: Indicates whether the product is a single item or part of a set with multiple variants.
- Images: Shows thumbnails of product images.
- Prices: Displays the price of the product.
- Product Margins: Shows the profit margin on each product, calculated as the difference between the selling price and the cost.
- Status: Indicates if the product is active or inactive.
- Quantity: The amount of stock currently available for the product.
- Actions: Contains buttons for various actions you can perform on the product.
- Infinite Quantity: ∞ this symbol means the product have infinite quantity available.
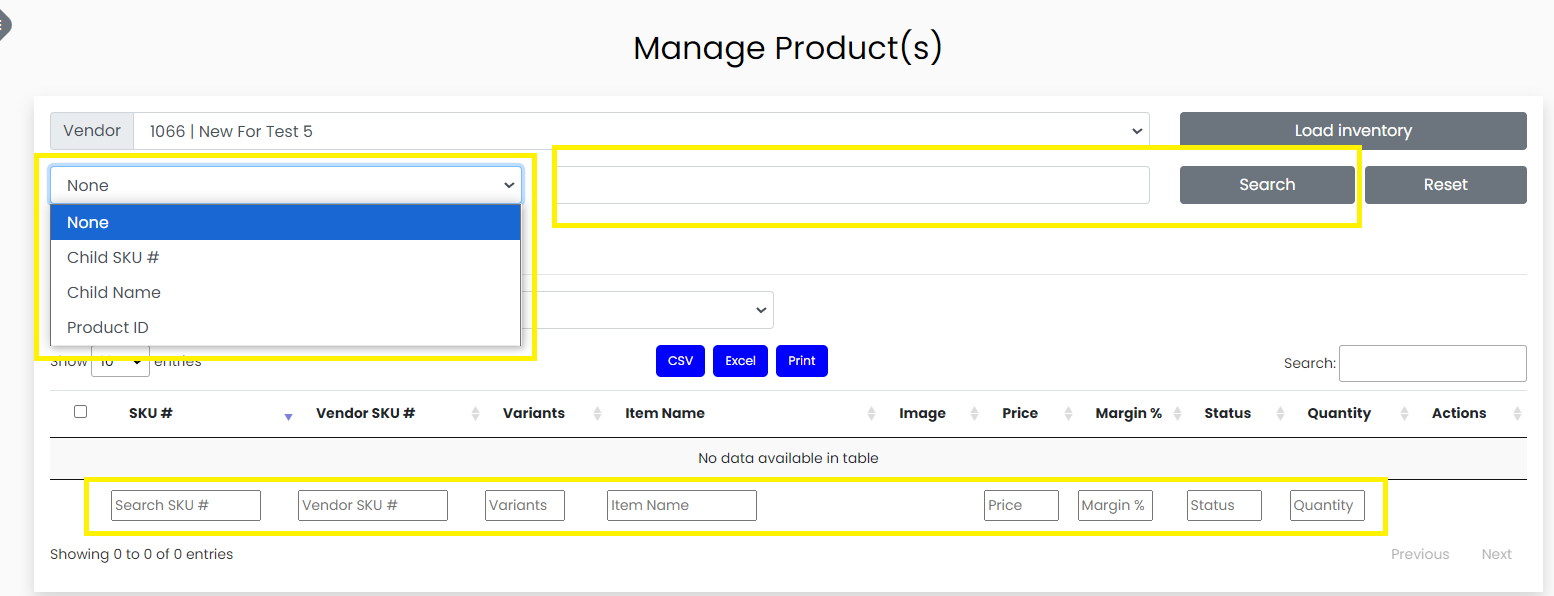
Search Functionality:
Top Search Bar:
Purpose: Allows you to search for specific products.
Search Criteria: You can search by:
Child SKU: The unique identifier assigned to each product variant.
Child Name: The name of the product variant.
Product ID: The main identifier for the product.
Bottom Search Bars:
Purpose: Filter and find products based on the data in specific columns.
Search Criteria: You can search by entering numbers or text relevant to the column data.
Add New Item or Service:
To add new products or services product, click the Add New Item button. This action opens a page where you can enter essential details, including SKU, name, description, price, and quantity. After filling out the required fields, Save to add the new item to your inventory. If you need to refresh the page to reflect recent changes, use the Refresh button located on the page.
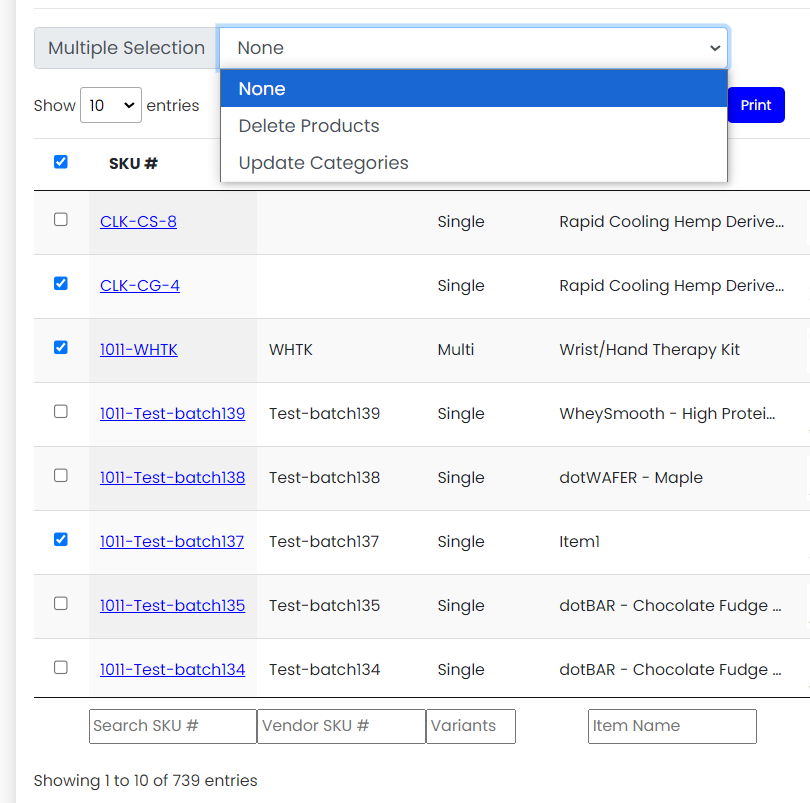
Multiple Selection
Purpose: Allows you to perform bulk actions on selected products.
How to Use:
Selection: Check the boxes next to the products you want to include.
Actions: Choose from available bulk actions, such as deleting products etc.
Viewing and Updating Product:
To view or update detailed product information, click on the SKU Hyperlink associated with each product.
 This will take you to a detailed view where you can make necessary adjustments. The Action Button offers further options such as assigning or updating or deleting images, and managing prices. You can also toggle the product’s status between active and inactive.
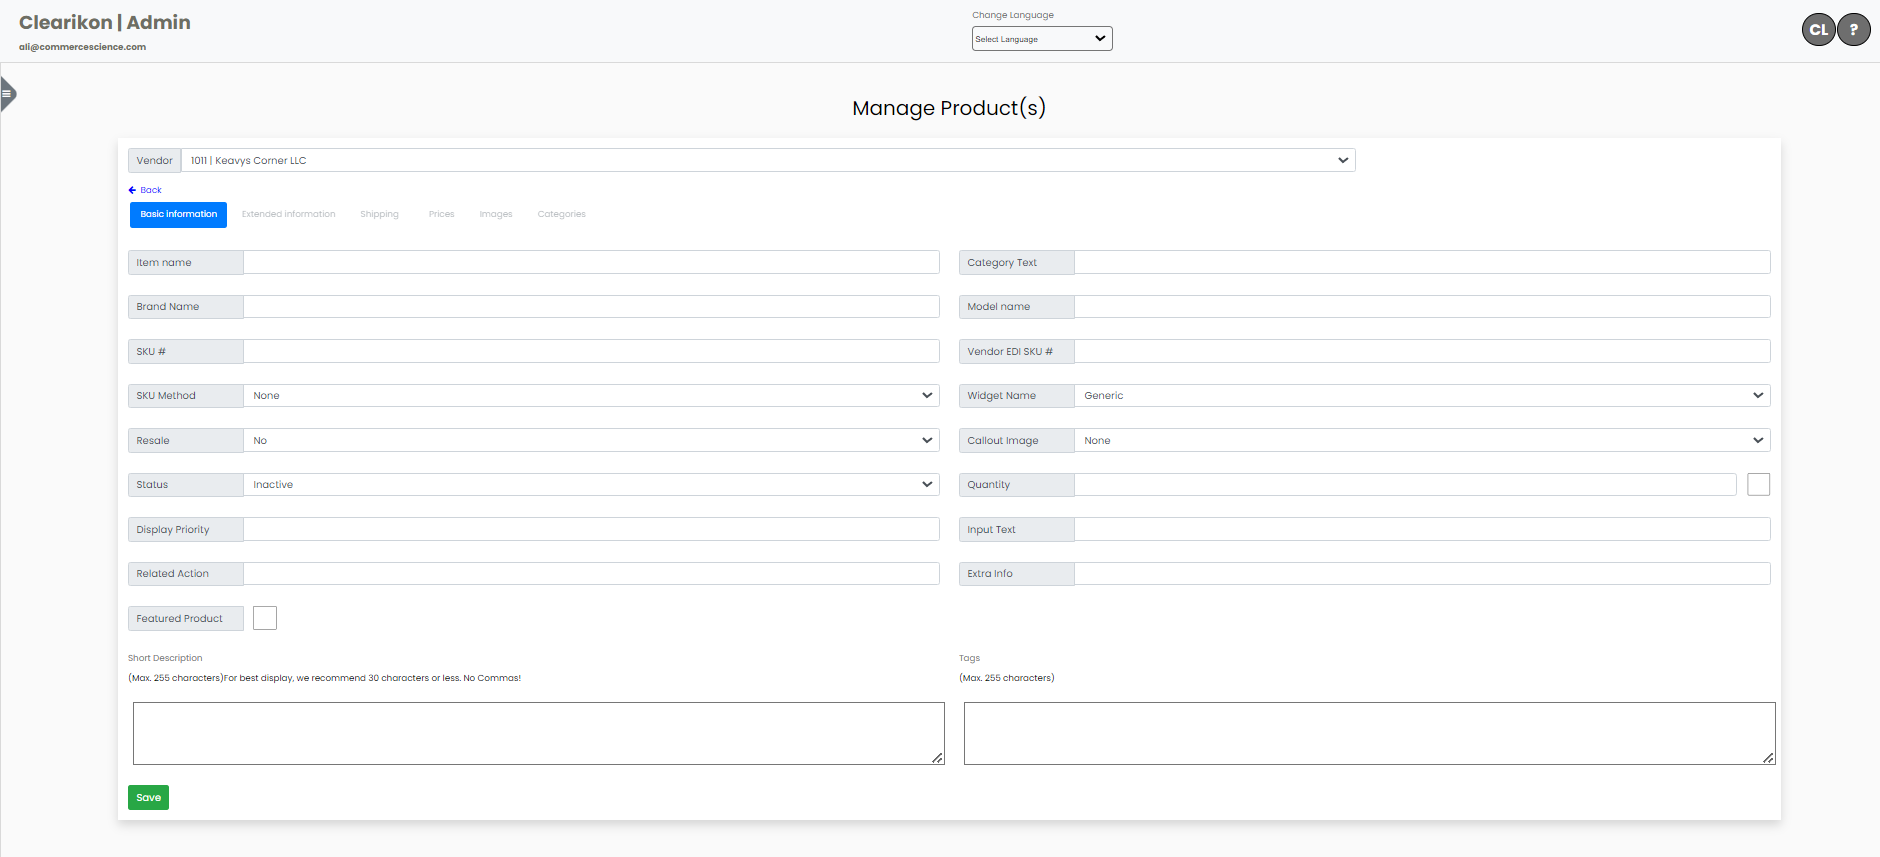
Activate a product:
Click on the SKU hyperlink associated with each product. In the products detail page, do the below steps to activate the product:
1. Click on Shipping tab, select a shipping type with shipping value, and save shipping details.
2. Click on Prices tab and set Base Price, List Price, Cost, price, and commission and save the prices.
3. Click on Basic Information tab, select product status active, and save.
4. To activate multi-SKU products perform the above steps and all child products should also be active in Options tab.
5. Refresh the page and see the status of product in the Status column:
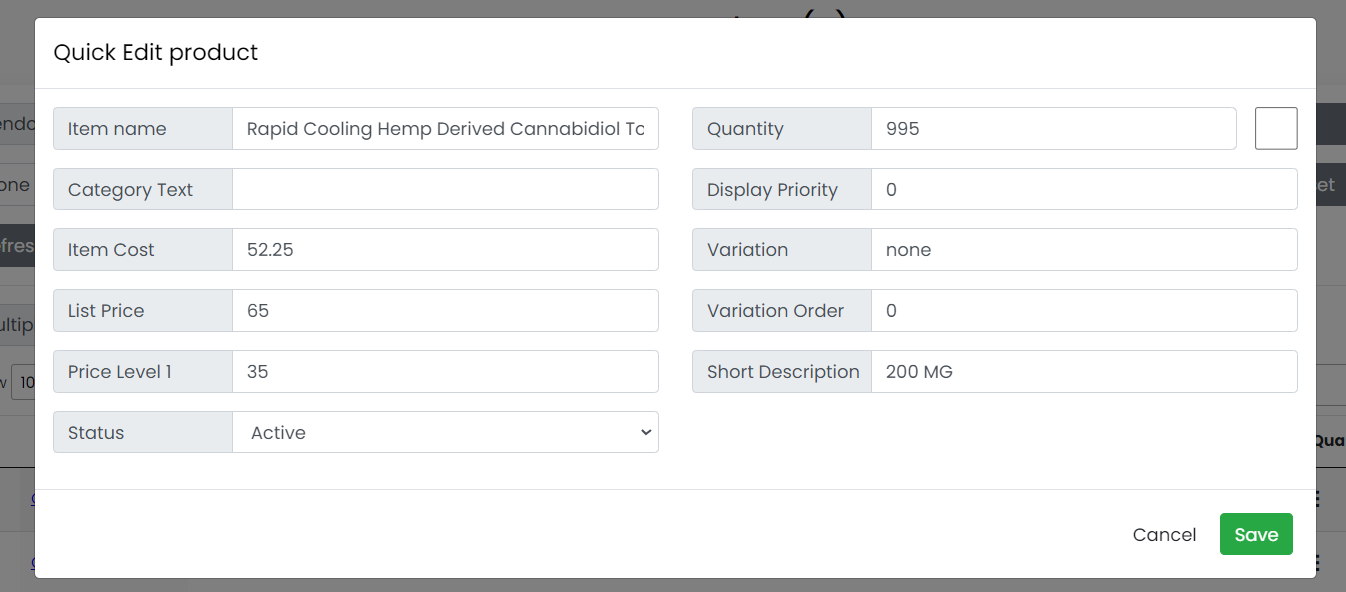
Quick Edit Actions:
Editable Fields:
Item Name: Change the name of the product.
Quantity: Update the available stock quantity.
Prices: Modify the selling price.
Status: Toggle between active and inactive.
Short Description: Update the brief description shown in the product list.
The Quick Edit feature facilitates rapid changes to key product details. You can adjust the item name, quantity, prices, status, and short description directly from this interface. For more detailed updates, use the Update Product section to revise detailed descriptions and add product-related videos.
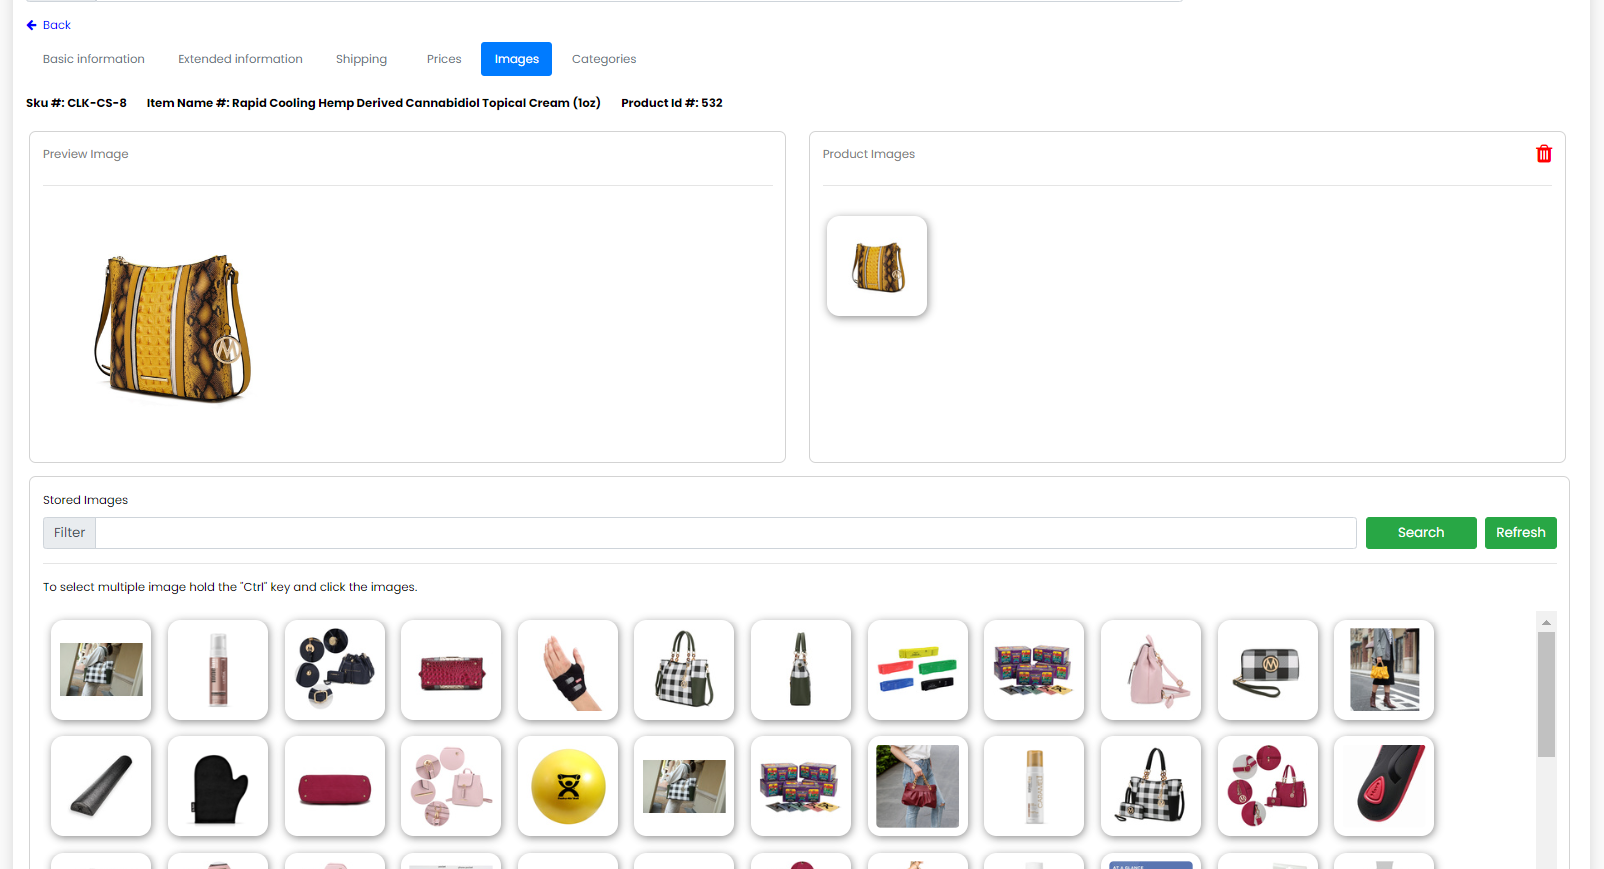
Update/Delete Images:
Update: Replace existing images with new ones.
Delete: Remove images that are no longer needed.
Price Management:
Purpose: Change the product's price and set its availability status.
Update Price: Enter a new price, cost and save.
Activate/Deactivate Product: Toggle the product status between active and inactive.
Shipping:
The Shipping section enables you to manage shipping details, including setting or updating shipping costs and handling image assignments related to shipping information. This holistic approach to inventory management ensures that all aspects of your product catalog are efficiently maintained and updated.

Read More about shipping: Click Here
Product Deletion Documentation
When a user attempts to delete an active product, the system will display an error message. The user must first deactivate the product before it can be deleted.
Steps to Delete a Product
Identify the Product: Navigate to the product you wish to delete
Error Message: If the product is active, an error message will appear stating:
"Error: You are not able to delete an active product. Please unactivate the product before deletion."
Go to the product settings.
Change the status from "Active" to "Inactive".
Confirm Deactivation: Save the changes.
Delete the Product: Return to the product list and attempt deletion again.
Single SKU
A single SKU does not have the Options Module, as it does not feature multiple variants.
Locating Child SKUs of Multi-Products
To find the child SKUs for multi-products:
Open the main SKU.
Navigate to the Options tab.
This will display all associated child SKUs for the selected product.
Inventory Search Feature in All vendors
The "Search All Vendors for a Product" feature allows users to search for a product across all vendor catalogs simultaneously. By entering either the SKU or Item Name, the system will display matching products from different vendors, sorted at the top of the search results for easy access. This feature ensures efficiency in locating the correct product without the need to manually check each individual vendor's catalog.
Steps to Use the "Search All Vendors for a Product" Feature
Step 1: Navigate to the Inventory Search Section
Location: Go to the Inventory page within the system.
This is where you can manage products, check stock levels, and search for products.
Step 2: Open the Search Dropdown
Action: Locate the Search Bar at the top of the page.
Click on the dropdown arrow next to the search bar to reveal different search options.
Step 3: Select "Search All in Vendors"
Dropdown Option: In the dropdown menu, select the option called "Search All in Vendors".
This will instruct the system to search across all vendors rather than a single vendor's catalog.
Step 4: Enter Search Criteria (SKU or Item Name)
Input Fields: In the search field, enter either:
SKU (Stock Keeping Unit): The unique identifier for the product.
Item Name: A keyword or the full name of the product.
The system will start matching products as you type and will show relevant suggestions.
Step 5: View Search Results
After entering the SKU or Item Name, press Enter or click Search.
Results Display: The system will display a list of matching products sourced from all vendors.